Aquaponics STEM Project Guide for Middle School Classrooms
Answer-first overview
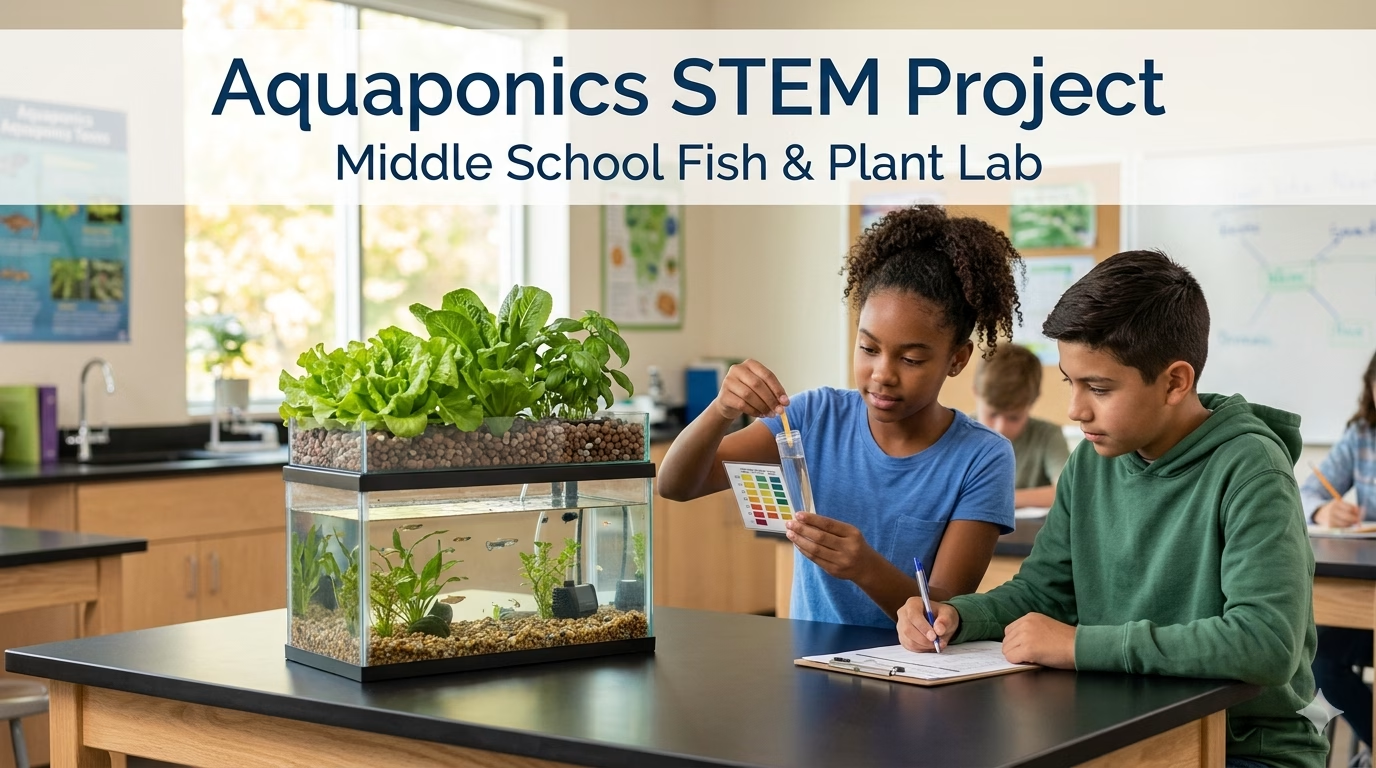
A middle school aquaponics STEM project is a small, closed-loop system where students raise fish and plants together while monitoring water quality, modeling ecosystems, and practicing real data collection.
In a classroom system, fish waste provides nutrients for plants, plants help clean the water, and students use simple test kits to keep parameters like pH, ammonia, nitrite, and nitrate in safe ranges for both organisms.
With a clear 10 lesson curriculum, teachers can guide students to design, build, maintain, and analyze an aquaponic ecosystem that aligns with NGSS standards on ecosystems, matter cycling, and sustainability.
TL;DR: A classroom aquaponics build is a powerful, hands on way to teach middle school STEAM using a live fish plant ecosystem, basic water quality testing, and structured data sheets.
This guide walks through equipment, setup, water targets, a full 10 lesson sequence, printable rubrics, and tips for adapting the project to different spaces and climates.
Affiliate Disclosure: This article contains affiliate links. If you purchase through these links, soilfreeharvest.com may earn a small commission at no extra cost to you.
What is an aquaponics STEM project?
Aquaponics combines aquaculture (raising fish) with hydroponics (growing plants in water without soil) in a recirculating loop.
Fish produce waste that is converted by beneficial bacteria into nitrate, which plants use as fertilizer, and the plants in turn help clean the water before it returns to the fish tank.
In a STEM classroom project, this closed loop becomes a living lab where students can investigate nitrogen cycling, organism interactions, carrying capacity, and water chemistry using real instruments and data collection routines.
Because the system is compact and modular, a tabletop design can fit in most middle school classrooms or after school programs without needing outdoor space.
How does a classroom aquaponics system work?
At minimum, a classroom aquaponics system has one tank for fish, one bed or container for plants, a pump to move water up to the plants, and gravity or a drain to return water to the fish tank.
As fish are fed, they release ammonia into the water, which nitrifying bacteria convert first to nitrite and then to nitrate that plants can safely use.
Students monitor parameters like pH, temperature, dissolved oxygen, ammonia, nitrite, and nitrate to ensure the shared water stays healthy for fish, bacteria, and plants.
Over several weeks, learners can see plant growth accelerate as the biofilter matures and can analyze how management decisions impact system stability and yield.
Why use aquaponics for middle school STEAM?
Aquaponics integrates science, technology, engineering, art, and math in one coherent project that naturally supports project based learning and inquiry.
Research on classroom aquaponics shows that multi week investigations around carrying capacity, water quality, and system maintenance can improve students perceptions of STEM disciplines, particularly in urban settings.
Because students must care for live organisms and troubleshoot real system issues, the project reinforces responsibility, collaboration, and perseverance alongside content knowledge.[9]
Aquaponics also connects directly to sustainability topics such as efficient water use, food security, and closed loop agriculture, which are central themes in many middle school curricula.
NGSS connections for grades 6 to 8
A classroom aquaponics ecosystem is a natural fit for NGSS middle school standards on ecosystems and matter cycling, especially MS LS2 and MS LS1.
Relevant performance expectations include MS LS2 1 (effects of resource availability on populations), MS LS2 2 (patterns of interactions among organisms), and MS LS1 6 (role of photosynthesis in cycling matter and energy).
Teachers can also connect to MS PS1 3, which focuses on how synthetic materials derive from natural resources and affect society, by comparing conventional fertilizers to biologically derived nutrients in aquaponics.
The project supports NGSS science and engineering practices such as developing and using models, analyzing and interpreting data, constructing explanations, and designing solutions to improve system performance.
What equipment do you need for a simple classroom aquaponics system?
A beginner friendly school system should be simple, modular, and sized to the available space, power, and supervision time.
The core components can usually be sourced from local hardware stores and aquarium suppliers, which helps keep costs manageable for schools and clubs.
Core system components
- Fish tank or tote
- Plant grow bed or raft container
- Submersible pump and tubing
- Mechanical pre filter such as a simple swirl filter bucket or sponge filter
- Biofilter media (gravel, expanded clay, or sponges)
- Air pump and air stone for dissolved oxygen
- Basic aquarium heater if room temperatures drop below fish comfort range
- Timer or continuous run outlet for the pump
Monitoring and safety gear
- Freshwater master test kit for pH, ammonia, nitrite, and nitrate
- Thermometer for continuous monitoring
- Dissolved oxygen test kit or meter if available
- Net, siphon, and bucket for fish handling and cleaning
- Surge protected power strip placed above splash level
- GFCI protected outlet if possible
In practice, many classrooms start with a 20 to 40 gallon fish tank, a single media bed or raft container above or next to the tank, and a small pump sized to turn the tank volume over about once per hour.
Warm water species like goldfish or tilapia are often recommended because they tolerate a wide temperature range that fits typical classroom conditions.
What water quality targets should students use?
Students need concrete targets so they can interpret test results and make informed decisions about feeding, water changes, and stocking.
The ranges below are based on extension and aquaculture guidance for warm water aquaponic systems.
Recommended classroom aquaponics water parameters
| Parameter | Target classroom range | Notes |
|---|---|---|
| Temperature | 70 to 80 °F | Suitable for many warm water fish and leafy greens. |
| pH | 6.5 to 7.5 | Balances fish, plant, and bacteria needs. |
| Ammonia (NH3/NH4+) | near 0, below 1 mg/L | Higher levels stress fish and indicate overfeeding or immature biofilter. |
| Nitrite (NO2 ) | near 0, below 0.5 to 1 mg/L | Elevated nitrite is toxic to fish and signals incomplete nitrification. |
| Nitrate (NO3 ) | 20 to 150 mg/L | Provides plant nutrients, very high levels suggest insufficient plant uptake or water changes. |
| Dissolved oxygen | 4 to 6 mg/L or higher | Supports fish and bacteria health, maintained with aeration. |
Many aquaponics references describe an ideal pH compromise around 6.8 to 7.0, with acceptable ranges roughly 6.4 to 7.4 or 6 to 7 for a healthy compromise between fish, plants, and bacteria.
In classroom practice, it is usually safer to focus on avoiding sudden swings and keeping values within broad safe ranges instead of chasing a single perfect number.
Water testing guide for hydroponic systems → The Complete Water Quality Testing Guide for Hydroponics
How to build a simple classroom aquaponics system
Title
Build a tabletop media bed aquaponics system for middle school STEM
Short description
This procedure walks teachers and students through building a compact aquaponics system using a 20 to 40 gallon fish tank and a single media filled grow bed suitable for leafy greens and herbs.
The system is sized for typical middle school classrooms and focuses on simplicity, safety, and easy access for data collection.
Materials and tools
- 20 to 40 gallon glass aquarium or food safe tote for fish
- Matching sturdy stand or lab bench
- Shallow plastic tote or grow tray to use as plant bed (holds 3 to 4 inches of media)
- Expanded clay pellets or rinsed pea gravel as grow media
- Submersible pump rated for 2 to 4 times tank volume per hour
- Flexible vinyl tubing to connect pump to grow bed
- Bulkhead fitting or uniseal and standpipe for drain back to tank
- Small air pump, airline tubing, and air stone
- Aquarium heater if room temperatures drop below 70 °F
- Power strip with surge protection placed above splash level
- Freshwater test kit for pH, ammonia, nitrite, nitrate
- Thermometer and, if available, dissolved oxygen test kit
- Fish food appropriate for chosen species
- Seedlings of fast growing leafy plants such as lettuce, basil, or mint
- Measuring tools, permanent markers, student lab notebooks, and printed data sheets
Step 1 – Plan the layout and safety zones
Have students sketch the system showing the fish tank, grow bed, pump, and drains, making sure the grow bed sits higher than the tank so gravity will return water.
Confirm that the final location has access to power, is away from high traffic paths, and has space for students to approach for testing and observations.
Step 2 – Prepare the fish tank and stand
Rinse the tank or tote with clean water only, avoiding soap or chemicals that could harm fish.
Place the tank on a level, sturdy surface and mark a maximum fill line that leaves several centimeters of freeboard to prevent splashes.
Step 3 – Build and position the grow bed
Drill a hole for the bulkhead or uniseal near one end of the grow bed and install a standpipe so water will drain back into the fish tank below.
Fill the bed with rinsed media to a depth of about 3 to 4 inches, keeping the top layer slightly above the usual flood level to reduce algae and evaporation.
Step 4 – Plumb the pump and circulation loop
Place the submersible pump in the fish tank, run tubing up to the grow bed, and secure the outlet so it evenly distributes water over the media surface.
Adjust the standpipe height or pump flow so the bed fills and drains reliably without overflowing, then plug the pump into a surge protected strip.
Step 5 – Add aeration and environmental controls
Install an air stone in the tank connected to a small air pump to maintain dissolved oxygen levels for fish and bacteria.
If room temperatures drop below the comfort range for your chosen fish, add an appropriately sized aquarium heater and set it to maintain roughly 72 to 78 °F.
Step 6 – Cycle the system before full stocking
Fill the system with dechlorinated water and run it for several days while students monitor pH and temperature to ensure stability.
Use a fishless cycling method or a small initial fish load, gradually introducing ammonia and waiting 2 to 4 weeks for beneficial bacteria to establish, as described in many aquaponics cycling guides.
Step 7 – Add fish and plant seedlings
Once tests show that ammonia and nitrite stay near zero while nitrate begins to rise, introduce hardy fish at a conservative stocking rate such as a few small goldfish for a 20 gallon tank.
Transplant leafy green seedlings into the media, gently washing most soil from roots, and ask students to predict growth differences compared to soil grown controls.
Step 8 – Establish daily and weekly care routines
Create rotating student roles for feeding, visual fish checks, plant inspection, and basic water testing so responsibilities are shared.
Set up posted checklists and printed data sheets so daily readings for pH, temperature, ammonia, nitrite, and nitrate are recorded consistently.
Classroom hydroponic build with media beds → Hydroponics Basics for Grades 3-5 Classrooms: Hands-On Styrofoam Raft Projects and NGSS Lesson Plans
What does a 10 lesson aquaponics curriculum look like?
The sequence below is designed for 10 lessons of roughly 45 to 60 minutes each, running in parallel with the physical system build and early operation.
It draws on existing aquaponics curricula that use about 10 lessons to cover water quality, environmental science, and system operation while aligning to NGSS.
Overview table of lessons
| Lesson | Focus question | Core activity | Key NGSS links |
|---|---|---|---|
| 1 | What is aquaponics and how is it different from soil farming | Concept mapping, video and discussion | MS LS2 1, MS LS2 2 |
| 2 | How do fish, plants, and bacteria interact in this system | Nitrogen cycle modeling with diagrams | MS LS2 2, MS LS2 3 |
| 3 | How do we design a safe classroom system | Engineering constraints, sketching, simple risk assessment | MS ETS1 design practices |
| 4 | How do we build and plumb the system | Hands on build in teams | Science and engineering practices from MS LS2 |
| 5 | How do we test water quality and why does it matter | pH and ammonia testing stations, interpreting ranges | MS LS2 1, analyzing and interpreting data |
| 6 | What happens as the biofilter matures | Multi week data graphing of ammonia, nitrite, nitrate | MS LS2 3, matter cycling |
| 7 | How do plants respond to water quality and light | Measuring plant growth rates, comparing to controls | MS LS1 6, energy in organisms |
| 8 | How sustainable is aquaponics compared to other food systems | Case study reading, water use and inputs analysis | MS ESS3 human impacts |
| 9 | How can we improve this system through engineering | Student proposed modifications, small experiments | Designing solutions practices |
| 10 | What did we learn about ecosystems and sustainability | Student presentations, reflections, and rubric based assessment | Multiple MS LS2 expectations |
Downloadable lesson snapshot descriptions
You can copy and paste the lesson sequence above into word doc or learning management system as a printable or shareable curriculum overview.
Each lesson can be expanded with local reading selections, math extensions, and cross curricular ties to art or social studies.
Printable student data sheets
The following tables can be copied into a document or spreadsheet and printed as data sheets for student notebooks.
Having standardized forms encourages consistent data collection that supports meaningful graphing and analysis.
Daily water quality log
| Date | Time | Student initials | Temperature (°F) | pH | Ammonia (mg/L) | Nitrite (mg/L) | Nitrate (mg/L) | Observations on fish behavior | Observations on plants |
|---|
Weekly plant growth log
| Date | Plant ID / bed location | Species | Height (cm) | Number of leaves | Color notes | Any signs of deficiency or damage |
|---|
System change log
| Date | Change made (water change, new fish, new plants, cleaning) | Reason for change | Who completed it | Follow up notes after 24 hours |
|---|
NGSS aligned rubrics for assessment
Rubrics help formalize how students are assessed on content understanding, data practices, collaboration, and sustainability thinking in the aquaponics project.
The example below uses four performance levels and can be adapted to local grading systems while keeping explicit ties to NGSS practices and crosscutting concepts.
Aquaponics project rubric – content and practices
| Criteria | 4 – Exceeds expectations | 3 – Meets expectations | 2 – Approaching expectations | 1 – Beginning |
|---|---|---|---|---|
| Ecosystem and nitrogen cycle understanding | Accurately explains interactions among fish, plants, and bacteria and traces nitrogen transformations with detailed evidence from the class system | Correctly describes roles of fish, plants, and bacteria and identifies basic nitrogen cycle steps with some evidence from observations | Gives partial or sometimes inaccurate descriptions of organism roles or nitrogen transformations with limited evidence | Shows minimal understanding of organism interactions or nitrogen cycle, provides little or no evidence |
| Data collection and analysis | Consistently collects complete data, organizes it clearly, and uses graphs to identify trends and support claims | Usually collects required data and uses simple graphs or tables to describe trends | Data is incomplete or disorganized, graphs are missing or hard to interpret | Rarely records data or misuses graphs, cannot describe trends |
| Engineering and problem solving | Proposes and tests creative system improvements using clear reasoning and reflection on results | Suggests reasonable improvements and participates in testing and revising designs | Offers few ideas or relies on others to design and test system changes | Does not participate meaningfully in problem solving |
| Collaboration and responsibility | Takes initiative in shared tasks, supports peers, and shows strong care for living organisms | Works well in group tasks and usually follows care routines responsibly | Participates inconsistently or sometimes neglects assigned responsibilities | Frequently off task or ignores care routines |
| Sustainability and real world connections | Makes insightful connections between aquaponics, resource use, and food systems and can compare to other farming methods with evidence | Describes at least two ways aquaponics relates to sustainability or local food and can give simple comparisons | Makes vague or limited connections between the project and sustainability topics | Cannot articulate how aquaponics relates to sustainability or food systems |
You can distribute the rubric at the start of the unit so students know how their work will be evaluated and can self assess against the criteria.
Schools can also adapt descriptors to reflect local priorities such as community engagement, cultural connections, or career exploration.
Best plants and fish for classroom aquaponics
Leafy greens and herbs are usually the most forgiving plant choices for small indoor aquaponics systems because they grow quickly and tolerate moderate nutrient levels.
Examples include lettuce, basil, mint, and certain Asian greens that can be harvested in stages to keep the system planted over many weeks.
For fish, hardy warm water species such as goldfish or tilapia are common in teaching systems because they tolerate a range of temperatures and minor water quality fluctuations when properly managed.
In some regions, native species from local aquaculture programs may be an option, but you should always check regulations and avoid releasing any classroom fish into local waterways.
Troubleshooting common classroom aquaponics problems
Even a simple system will experience issues such as cloudy water, algae growth, or stressed fish, which can be reframed as opportunities for student led investigations.
Many problems trace back to overfeeding, overstocking, clogged media, or skipping water tests, all of which can be addressed with routines and student ownership.
Encourage students to use data, observations, and NGSS practices such as constructing explanations and designing solutions rather than relying on guesswork.
Quick reference charts that connect specific symptoms to likely causes and response steps are helpful to post near the system.
Sample troubleshooting chart
| Symptom | Likely cause | First responses |
|---|---|---|
| Fish gasping at surface | Low dissolved oxygen, high ammonia or nitrite | Increase aeration, stop feeding temporarily, test water, perform partial water change if parameters are high.[1][2] |
| Cloudy or green water | Overfeeding, excess nutrients and light, algae growth | Reduce feeding, remove uneaten food, adjust light cycle, consider adding shade for tank.[2][3] |
| Yellowing leaves with green veins | Possible iron or nutrient deficiency, high pH reducing nutrient availability | Check pH, consider adding iron chelate appropriately, review feeding and plant density.[1][3] |
| Slow plant growth but high nitrate levels | Insufficient plant density, low light, immature roots | Add more plants, improve lighting conditions, check root health.[2][3] |
How to adapt the project to space and climate
Many classrooms do not have outdoor access, so tabletop aquaponics systems that run entirely indoors under fluorescent or LED lights are often the most practical.
From multiple runs of indoor and outdoor systems in hot, dry climates like Phoenix, it is clear that shading tanks, avoiding direct sun on tubing, and planning for evaporative losses are critical to prevent overheating.
In colder climates such as Central Michigan, indoor systems tend to be more stable, but room temperature drops on weekends or holidays make aquarium heaters and insulated tank locations more important.
You can involve students in monitoring how temperature and light conditions change over the day and across seasons, then adjust system management plans accordingly.
Classroom management and student roles
A living aquaponics system requires daily attention, so clear routines and student job rotations help distribute workload and build ownership.
Popular roles include water tester, feeder, data recorder, photographer, system inspector, and communications lead who shares updates with families or the wider school community.
Creating backup plans for weekends and vacations, such as automatic feeders or designated staff checks, prevents gaps in care.
Explicitly connecting these responsibilities to NGSS science and engineering practices frames them as authentic scientific work rather than chores.
FAQ – Aquaponics STEM project for classrooms
How much does a basic classroom aquaponics system cost?
Most small classroom systems that use a 20 to 40 gallon aquarium, a single media bed, simple pump, and basic test kit can be built in the few hundred dollar range using off the shelf parts.
Costs decrease when schools repurpose existing tanks, seek donations, or partner with local aquarium or garden clubs.
How long does it take to see plant growth and system stability?
Students usually see visible plant growth within one to two weeks after transplanting seedlings, especially with fast growing leafy greens.
However, full biological cycling of the system, where ammonia and nitrite stay low and nitrate rises predictably, often takes 2 to 4 weeks or longer depending on temperature and stocking levels.
Is aquaponics too complex for middle school students?
Aquaponics can be very manageable for middle school when systems are kept simple, stocking densities are conservative, and routines are built into class time.
Many existing curricula designed for grades 6 to 8 show that students can successfully learn water quality testing, nitrogen cycling, and sustainability concepts with appropriate scaffolding.
What are the biggest risks or downsides for schools?
The main risks include fish loss from power outages, equipment failure, or water quality neglect, plus potential spills if tanks are overfilled or plumbing fails.
Mitigation strategies include using GFCI outlets, placing tanks on waterproof mats, posting clear care checklists, and having a plan for maintaining the system during breaks.
How much class time does this project require each week?
During the build and initial cycling phase, teachers often devote one full class period per week plus short daily check ins for feeding and quick observations.
Once stable, the system can be maintained with brief routines while more in depth investigations happen periodically as part of unit lessons.
Can students eat the plants or harvest the fish?
Many classroom aquaponics projects focus on small harvests of leafy greens that can be tasted in class or shared in school events once teachers ensure food safety protocols are followed.[6]
Harvesting fish is less common in middle school settings and depends on community norms, system scale, and how fish are framed within the project.
What if water tests show high ammonia or nitrite?
High ammonia or nitrite readings are a red flag that the biofilter is not keeping up, often due to overfeeding, recent system changes, or inadequate cycling.
Typical responses include stopping feeding for a day or two, performing partial water changes with dechlorinated water, and reviewing whether fish stocking or feeding needs to be reduced.
How does aquaponics compare to simple hydroponics for STEM?
Hydroponics is usually simpler to start because nutrient levels are controlled by adding pre mixed solutions rather than managing fish and bacteria.
Aquaponics adds complexity and long term responsibility, but it also creates richer ecosystem modeling opportunities and stronger sustainability connections for students.
Can this project run in small spaces or apartments for home learners?
The same tabletop designs used in classrooms can be scaled down further for home use, provided there is a stable surface, access to power, and adult support for animal care.
Home growers and apartment gardeners may instead start with non fish hydroponics and later add fish once they are comfortable with water quality monitoring and local regulations.
Author note
This guide is written from the perspective of an indoor grower who has run recirculating hydroponic and aquaponic systems in both the intense heat of Phoenix, Arizona and the colder, more variable seasons of Central Michigan.
Experience with classroom sized systems in hot, dry climates highlights how critical shading, aeration, and conservative stocking are when summer temperatures climb.
More recent work with indoor systems in Michigan has focused on dialing in lighting, water quality monitoring routines, and student led data collection in tighter classroom and apartment spaces.
Across both regions, the goal has stayed the same – help teachers, home growers, and hobbyists build resilient, manageable systems that make ecosystems, water quality, and sustainability tangible for young learners.
Share this:

Discover more from Soil Free Harvest
Subscribe to get the latest posts sent to your email.