Designing a Central Hydroponic Reservoir: Shared Reservoir Design for Home Growers
TL;DR: If you want a beginner-friendly way to run several plants with one nutrient solution, a central reservoir is usually the most practical option. The key is to size it generously, keep it opaque, keep the solution oxygenated, and stay disciplined about pH, EC, and cleaning.
What is a central hydroponic reservoir?
A central hydroponic reservoir is a single tank that stores and supplies nutrient solution to multiple plants or grow sites. In shared-reservoir systems, the reservoir acts as the mixing point and buffer, helping keep nutrient strength and pH more stable across the whole setup.
In plain language, this design makes one “master tank” do the work that several smaller containers would otherwise handle. That is why it is popular for recirculating systems, connected DWC, drip systems, ebb and flow, and other multi-plant layouts.
How does shared reservoir design work?
The central reservoir holds the water and nutrients, then a pump or gravity feed moves that solution to the grow sites. Depending on the system type, the solution may return to the same reservoir after irrigation, or the grow sites may passively draw from the shared tank as plants drink.
This design works because a larger volume of solution changes more slowly than a small bucket. That gives you more time to catch pH drift, nutrient imbalance, or temperature issues before they hit the plants hard.
Where does it fit best?
Shared reservoir designs are best for:
- Lettuce.
- Basil.
- Spinach.
- Kale.
- Herbs.
- Strawberries.
- Cherry tomatoes.
- Peppers in larger, well-supported systems.
They are especially useful for recirculating DWC, flood-and-drain, and drip setups because the plumbing can distribute the same nutrient recipe to all sites at once.
Why use one central reservoir?
A central reservoir can make hydroponics easier to manage, especially for home growers with limited space. You only mix one batch of nutrients, test one tank, and clean one main container, which saves time and reduces day-to-day guesswork.
It also helps with scaling. If you later add more sites, you can often expand the plumbing and increase reservoir volume instead of rebuilding the whole system.
Main benefits
- Simpler nutrient mixing.
- Fewer testing points.
- Better consistency between plants.
- Easier expansion.
- Lower maintenance than multiple separate tanks.
- Less water and nutrient waste.
Main drawbacks
- A problem in one tank affects every plant.
- pH or EC mistakes spread fast.
- Root disease can spread through shared water.
- Reservoir temperature matters more because all plants share it.g
How big should the reservoir be?
Reservoir size depends on plant size, system type, and how often you want to refill. Practical rules of thumb from hydroponic suppliers commonly range from about 1 to 2 gallons per plant site for many home setups, with larger crops needing more volume.
For a shared reservoir, a safer starting point is to size for the mature crop, not the seedling stage. Small plants often do well with about 0.5 gallon each, medium plants around 1 to 1.5 gallons each, and large plants around 2.5 to 3 gallons each as a minimum planning number.
Easy sizing guide
| Crop size | Practical starting volume per plant | Notes |
|---|---|---|
| Small herbs | 0.5 to 1 gallon | Good for basil, mint, oregano |
| Medium leafy greens | 1 to 1.5 gallons | Lettuce, spinach, kale |
| Large fruiting plants | 2.5 to 3 gallons | Tomatoes, cucumbers, peppers need more buffer |
If you are unsure, oversize the reservoir rather than undersize it. Bigger tanks are usually easier to stabilize, while tiny tanks swing faster in pH, EC, and temperature.
What equipment do you need?
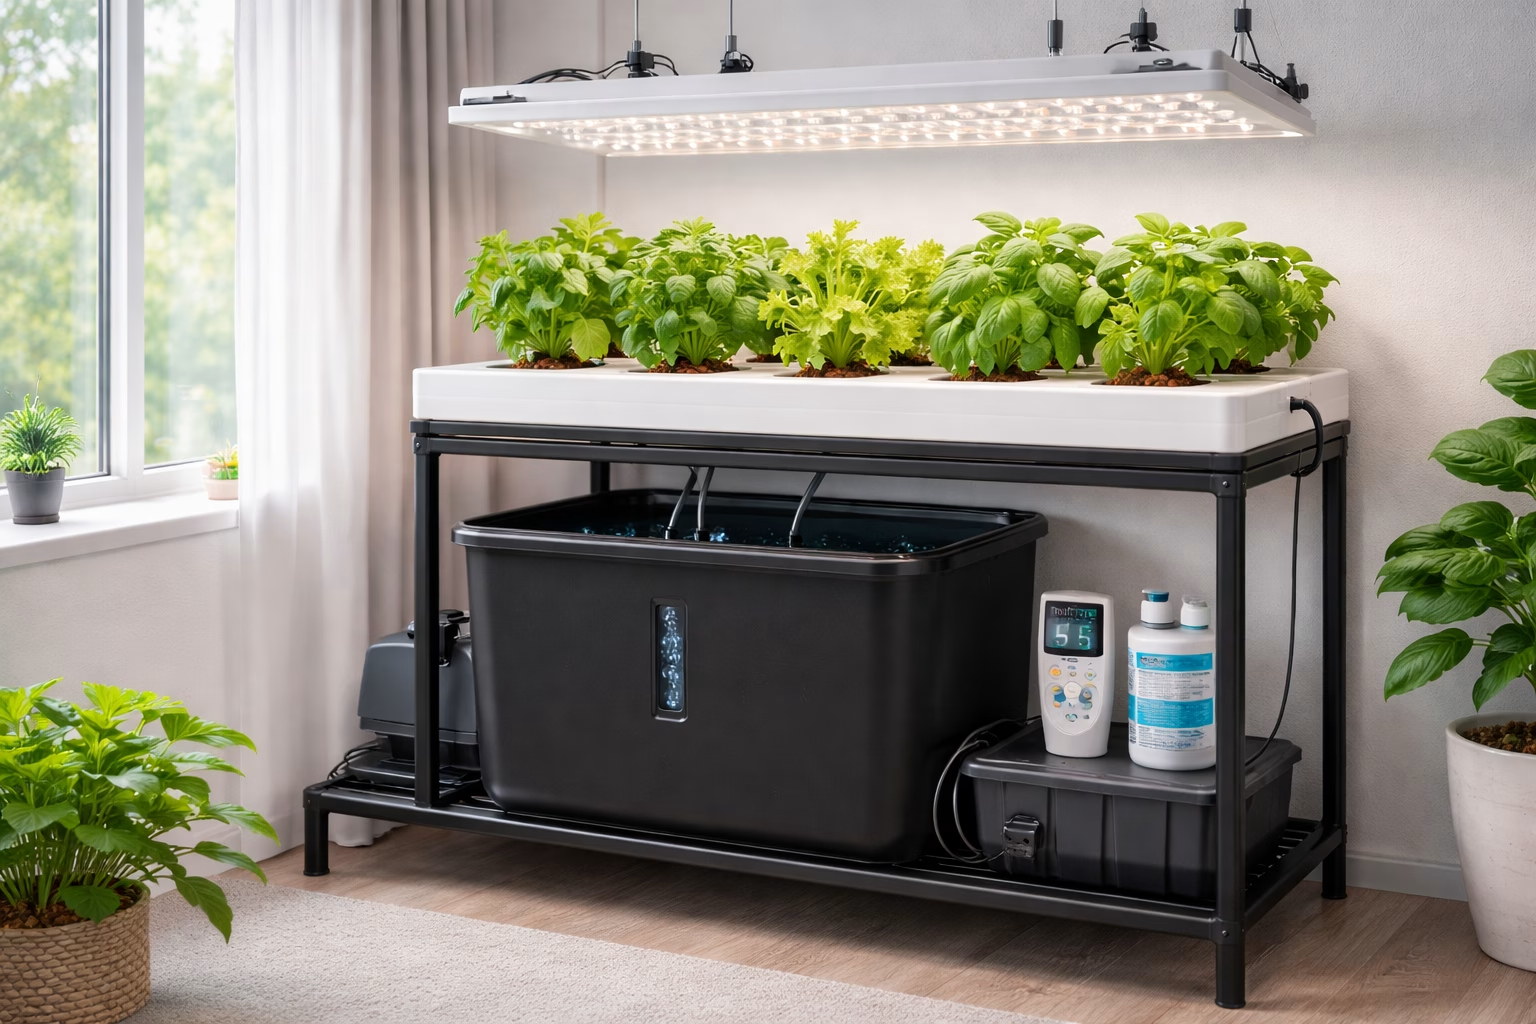
A shared reservoir system does not have to be complicated, but it does need the right core parts. At minimum, plan for a reservoir, lid, pump or air pump depending on the system, tubing, net pots or grow sites, and a way to test water quality.
Core materials
- Opaque reservoir or tank.
- Tight-fitting lid.
- Submersible pump or circulation pump.
- Air pump and air stone for oxygenation.
- Tubing and fittings.
- Net pots or plant holders.
- Growing media such as clay pebbles or coco-based media.
- Hydroponic nutrients.
- pH meter or test kit.
- EC or TDS meter.
- Water thermometer.
Helpful extras
- Float valve or auto-top-off.
- Drain valve.
- Inline filter.
- Spare tubing clamps.
- Backup air stone.
- Reservoir heater or chiller, depending on climate.
How do you build one?
Title: Build a Central Hydroponic Reservoir for a Shared System
Description: This setup creates a shared nutrient tank that feeds multiple hydroponic grow sites while keeping the solution easy to mix, monitor, and maintain.
Materials/Tools:
- Opaque reservoir.
- Lid.
- Drill with hole saw or step bit.
- Bulkhead fittings.
- Tubing.
- Submersible or circulation pump.
- Air pump and air stone.
- Net pots or connected grow sites.
- Hydroponic nutrients.
- pH meter.
- EC meter.
- Measuring cup or scale.
- Marker and tape measure.
Step 1: Choose the reservoir location
Place the reservoir where it is easy to reach for testing, topping up, and cleaning. Keep it out of direct light, because exposed nutrient water encourages algae and destabilizes the solution.
Step 2: Size the tank for mature plants
Calculate your total volume based on the largest plants you expect to grow. For many home systems, that means planning for at least 1 to 2 gallons per site, and more for fruiting crops or hot environments.
Step 3: Make the reservoir lightproof
Use an opaque container and a tight lid. Light leaks are one of the fastest ways to invite algae, which competes with plants and can reduce dissolved oxygen.
Step 4: Install plumbing and return lines
Drill and fit bulkheads or hose ports where needed, then route supply and return lines cleanly. Keep bends gentle and fittings secure so the system does not leak or trap debris.
Step 5: Add aeration and circulation
Install an air stone in the reservoir and connect it to an air pump. If you are running a recirculating design, add a circulation pump that keeps nutrients mixed and evenly distributed.
Step 6: Mix nutrients and adjust pH
Fill with clean water, add nutrients according to label directions, then adjust pH. Most leafy crops do well around pH 5.5 to 6.5, and many growers aim near 5.8 to 6.2 for a stable middle ground.
Step 7: Check EC before planting
Measure EC or TDS before introducing seedlings. If the solution is too strong, dilute it; if it is too weak, add nutrients slowly and retest so you do not shock the roots.
Step 8: Start plants and verify flow
Place seedlings into their sites and confirm that every plant gets solution and oxygen. In shared systems, one blocked line or weak pump can create uneven growth quickly, so check flow the first day and again after the first few irrigation cycles.
Step 9: Log your first week
Track reservoir level, pH, EC, and temperature daily for the first week. That habit makes it much easier to spot patterns before they become plant stress.
What water conditions should you maintain?
For most leafy greens and herbs, the common hydroponic pH target is 5.5 to 6.5. Many growers keep EC in a crop-specific range rather than chasing one universal number, because seedlings, leafy greens, and fruiting crops all feed differently.
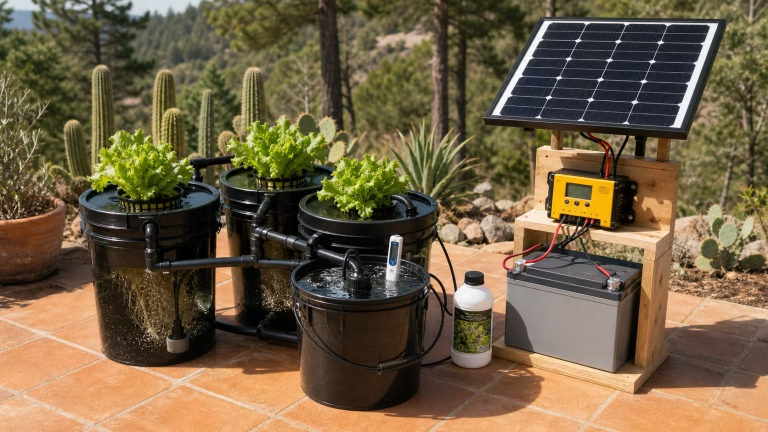
In my own DWC-style setups, the biggest stability gains came from keeping the reservoir opaque, testing often, and avoiding big nutrient jumps. When I worked in hot, dry conditions, a larger reservoir and consistent top-off routine made the system much easier to manage day to day.
Practical targets
- pH: 5.5 to 6.5 for most common crops.
- EC: follow crop-specific guidance and adjust gradually.
- Temperature: cooler nutrient solution generally holds more oxygen, often around the mid-60s to mid-70s Fahrenheit for many hobby systems.
How do you maintain a shared reservoir?
Maintenance is mostly about consistency. Check water level, pH, and EC on a schedule, top up with plain water as needed, and do a full cleanout before the solution becomes stale or imbalanced.
Many hobby growers change nutrients every 1 to 2 weeks, while some stretch a bit longer if the crop is stable and the system is well monitored. The exact schedule depends on plant load, reservoir size, temperature, and how much top-off water you add.
Weekly routine
- Check pH.
- Check EC.
- Inspect pump output.
- Look for leaks.
- Top up water.
- Remove debris.
- Log readings.
- Inspect roots for odor or discoloration.
Full change routine
- Drain the tank.
- Rinse the reservoir.
- Clean slime or mineral buildup.
- Refill with fresh water.
- Add nutrients.
- Recheck pH and EC.
- Restart circulation and aeration.
What are the most common problems?
Shared reservoirs are efficient, but they magnify mistakes. If pH drifts, EC climbs, or oxygen drops, every connected plant feels it at once.
Common issues and fixes
| Problem | Likely cause | Fix |
|---|---|---|
| Algae | Light leaks | Use opaque tank and tight lid |
| Root stress | Warm, low-oxygen water | Improve aeration and keep solution cooler |
| Nutrient burn | EC too high | Dilute slowly and retest |
| Deficiency | EC too low or nutrient imbalance | Rebuild solution with proper dosage |
| Uneven growth | Weak flow or clogging | Clean plumbing and verify circulation |
| pH swing | Small reservoir or dirty solution | Increase volume, stabilize top-off routine |
A simple troubleshooting rule
If multiple plants show the same symptom at once, suspect the reservoir first. In a shared system, nutrient water is usually the common denominator.
Which system types work best with a central reservoir?
A central reservoir works especially well in recirculating or semi-recirculating systems. DWC, RDWC, ebb and flow, and drip systems all benefit from a single nutrient source when the plumbing is designed correctly.
Best fits
- RDWC, because the reservoir helps equalize water level and nutrient strength across buckets.
- Ebb and flow, because one tank can feed a flood table efficiently.
- Drip systems, because the reservoir is easy to mix and monitor.
- Connected DWC for hobby growers who want simpler nutrient management.
Less ideal fits
- Very small, experimental, or mixed-crop setups.
- Systems where different plants need very different nutrient strengths.
- Situations with weak temperature control or unreliable pumps.
What plants are best for beginners?
If you are new to a shared reservoir, start with fast-growing, forgiving crops. Leafy greens and herbs are the easiest place to learn because they respond quickly and tolerate a narrower nutrient window with less drama than fruiting crops.
Beginner-friendly plants
- Lettuce.
- Basil.
- Spinach.
- Kale.
- Mint.
- Oregano.
- Strawberries in a stable setup.
More advanced plants
- Tomatoes.
- Cucumbers.
- Bell peppers.
- Larger fruiting crops that need stronger lighting, more support, and tighter EC control.
What should apartment growers know?
For apartment gardeners, shared reservoir design is often a smart space saver. One tank, one pump, and a compact rack or shelf can support several plants without cluttering a room with multiple buckets and watering containers.
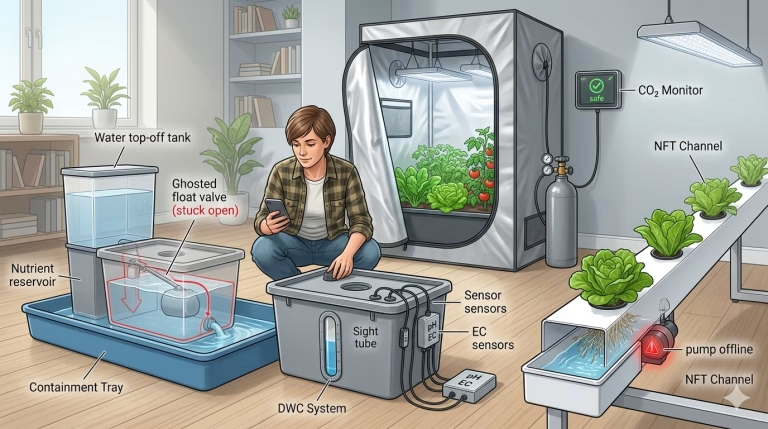
The main caution is noise, leaks, and heat. Use a stable stand, keep the reservoir tucked into a spill-safe tray if possible, and choose a pump that runs quietly enough for indoor living.
Helpful Links
Choosing the right hydroponic growing media → growing media guide
Best hydroponic system for small spaces → system comparison guide
Best plants for hydroponics beginners → crop selection guide
How much does it cost?
A basic shared reservoir can be relatively affordable if you are building it yourself. The biggest cost drivers are usually the tank size, pump quality, air pump, meters, and fittings.
A simple home setup can often start with a modest reservoir, tubing, an air pump, and a few grow sites. Once you add better meters, sturdier plumbing, and lightproof containers, the cost rises, but so does reliability.
FAQ
What is the biggest advantage of a central reservoir?
It simplifies nutrient management because you only mix and test one tank. That usually makes the system easier to scale and easier to keep consistent across multiple plants.
Is a shared reservoir good for beginners?
Yes, if you grow similar plants and keep the system simple. Leafy greens and herbs are the easiest crops to start with because they are less demanding than fruiting plants.
How often should I check pH and EC?
Check both at least weekly, and more often during the first few weeks or after changing nutrient strength. In a shared system, small changes can affect every plant, so regular testing matters.
Can one bad plant affect the whole reservoir?
Yes. If a root system develops rot, slime, or contamination, shared water can spread the problem fast. That is why cleanliness and early root inspection are so important.
How big should my reservoir be for lettuce?
A practical starting point is about 0.5 to 1 gallon per small plant, with more volume giving you a wider stability buffer. If you want fewer swings in pH and EC, err on the larger side.
Do I need an air pump?
In most shared reservoir systems, yes, especially for DWC and recirculating setups. Oxygen helps roots stay healthy and reduces the chance of stagnation in the nutrient solution.
Why does my reservoir turn green?
Green water usually means light is reaching the nutrient solution and algae is growing. Switch to an opaque container, tighten the lid, and block light around ports and tubing.
How long before I see results?
Fast crops like lettuce and herbs often show noticeable growth within 1 to 2 weeks, with harvest commonly arriving in roughly 30 to 45 days depending on variety and conditions. Fruiting crops take longer and need more stable feeding, support, and light.
What is the most common mistake?
Undersizing the reservoir. Small tanks swing quickly, which makes pH, EC, and temperature harder to control and can stress the plants.
Can I grow different crops in the same reservoir?
You can, but it is usually easier if the crops have similar nutrient needs. Mixing leafy greens with heavy-feeding fruiting plants often creates compromise feeding, which is harder to optimize.
Author note
I have spent years refining hydroponic systems across different indoor and urban growing environments, with experience shaped by both Phoenix, Arizona and Central Michigan. That mix taught me how much climate, reservoir size, and oxygenation matter in real-world setups. My focus is practical hydroponics for apartment growers, home growers, and anyone trying to build a reliable soil-free garden in limited space.
Share this:

Discover more from Soil Free Harvest
Subscribe to get the latest posts sent to your email.