Planning an Indoor Hydroponic Grow Room: Layout and Power Setup Guide
Planning an indoor hydroponic grow room comes down to two things: efficient layout and safe, reliable power. The right plan makes your space easier to work in, keeps plants healthier, and prevents overloaded circuits or heat problems. With a clear layout, a basic load calculation, and a few safety habits, even a small apartment grow can run smoothly long term.
TL;DR: Measure your space, choose a system size, and map where lights, reservoirs, and aisles go before buying gear. Then total the wattage of every device, keep each circuit under about 80 percent of its rating, and use GFCI protection, timers, and monitoring to keep your indoor hydro farm safe and stable.
What is an indoor hydroponic grow room?
An indoor hydroponic grow room is any enclosed space where plants are grown in water based systems under artificial light. It can be as small as a 2 x 4 grow tent or as large as a dedicated room lined with multiple racks and reservoirs.
Typical grow rooms include three core elements: hydroponic systems (such as DWC, NFT, or drip), grow lighting, and environmental control. Many home growers use tents, closets, garages, or spare bedrooms to build an indoor hydro farm that runs year round, independent of outdoor weather.
Types of hydroponic systems → comparison of DWC, NFT, ebb and flow, and Kratky
Which hydroponic systems and plants work best indoors?
For indoor grow rooms, compact and low splash systems are usually easiest to manage. These include:
- Deep water culture (DWC) buckets or totes
- Recirculating DWC systems
- NFT channels on shelves
- Drip systems feeding top of pots
- Small flood and drain (ebb and flow) tables
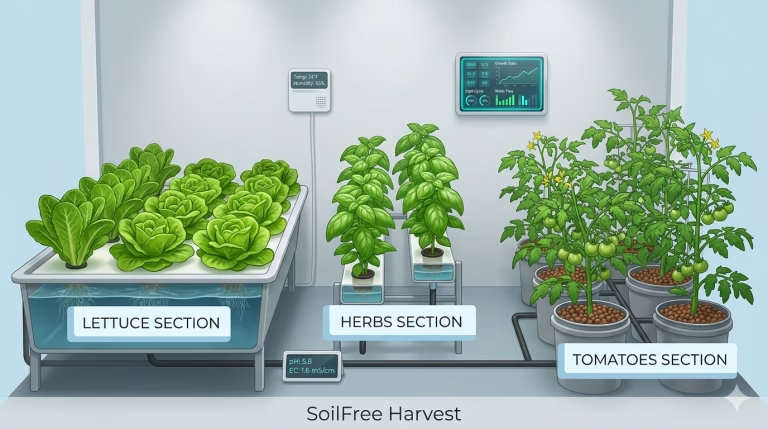
Leafy greens and herbs are the most forgiving indoors. Good starter crops include lettuce, basil, cilantro, mint, kale, Swiss chard, and pak choi. Fruiting crops like tomatoes, peppers, and cucumbers need more height, stronger lights, and heavier power planning but can produce impressive yields when set up correctly.
Best plants for indoor hydroponics → plant selection guide
How much space do you really need for an indoor hydroponic farm?
Space planning starts with a simple question: leafy greens only or also large fruiting crops. For compact greens in a tent or closet, a footprint between 2 x 4 feet and 4 x 4 feet is enough for 16 to 40 heads of lettuce at a time, depending on spacing.
For fruiting crops like tomatoes and peppers, plan at least 2 x 2 feet of floor space per plant site plus vertical clearance of 4 to 6 feet from reservoir to light. Also reserve 18 to 24 inches for a walkway so there is room to reach the back plants for pruning and maintenance.
Example grow room sizes and capacity
| Space type | Approx area | Typical systems | Plant count (greens) | Typical total wattage |
|---|---|---|---|---|
| Small closet or 2 x 4 tent | 8 sq ft | 1 DWC tote or 2 NFT channels | 12 to 24 | 300 to 500 W |
| 4 x 4 tent | 16 sq ft | 2 to 3 DWC totes or 4 NFT channels | 24 to 40 | 500 to 900 W |
| Spare room 8 x 10 | 80 sq ft | Multi shelf NFT plus DWC for fruiting | 60+ mixed | 1200 to 2200 W |
These numbers assume LED lighting and basic pumps and fans. Real totals depend on exact fixtures and climate controls, which will be covered in the power planning section.
How should you design your hydroponic grow room layout?
The best grow room layouts treat the space like a small production line. Plants move from seedling to harvest without bottlenecks, and the grower can reach every plant without stepping around reservoirs or tripping over cords.
Start by sketching the room to scale on paper or with simple software. Mark doors, windows, outlets, and any fixed obstacles. Then place systems, lights, and reservoirs so that water stays low, lights are centered above plants, and there is a clear path to all sides that need access.
What zones does an efficient grow room need?
Even in a tiny room or tent, it helps to think in zones:
- Seedling and propagation zone
- Vegetative growth zone
- Flowering or finishing zone (for fruiting crops)
- Utility zone for reservoirs, nutrients, and tools
In small spaces these zones may be stacked vertically on a rack. In larger rooms, they may be along different walls or inside separate tents to allow different light cycles.
Starting seeds for hydroponics indoors → seed starting and propagation guide
Where should you place systems, reservoirs, and aisles?
A practical rule is “water low, light high, access in the middle.” Keep reservoirs on the floor or a short stand so any leaks are contained and easy to see. Place channels, buckets, or tables above the reservoirs in a way that allows gravity return or short pump runs.
Aim for:
- 18 to 24 inch aisles where a person needs to walk regularly
- 6 to 12 inches between the wall and the back of systems for airflow and cord runs
- Reservoirs near a drain, floor sink, or at least a location where a wet vacuum or pump-out is easy
In very tight spaces like a 2 x 4 tent, one side often touches the wall and all access comes from the front. In that case, keep taller or more maintenance heavy plants in the front row so adjustments and harvesting are easier.
How can you adapt layouts for closets, tents, and spare rooms?
Different spaces call for slightly different strategies.
Closet or alcove
- One narrow system such as NFT channels or a single DWC tote
- Lights hung from a bar or closet rod
- Mylar or white walls to reflect light
- A small inline fan pulling air out of the top and passive intake at the bottom
Grow tent
- Predefined duct ports and cable ports simplify layout
- Typically one or two systems centered with 6 to 12 inches clearance on each side
- Carbon filter and fan hung overhead to free floor space
Spare room
- Multiple tents for different stages, or an open room with poly walls or panda film partitions
- Dedicated corner for reservoirs and water mixing
- Dehumidifier and portable AC sized for the whole room
How do you plan electrical and power for an indoor grow room?
Power planning is one of the most important parts of an indoor hydro setup. Every piece of gear uses electricity, and it all adds up on the same household circuits unless planned carefully.
In North America most home outlets are on 120 volt circuits rated at 15 or 20 amps. A safe rule is to use no more than about 80 percent of the rating on any one circuit. For a 15 amp circuit that is about 12 amps, and for a 20 amp circuit that is about 16 amps. The basic relationship is amps=voltswatts.
How much power do hydroponic lights and equipment use?
LED grow lights are usually the largest load. A common target is 25 to 40 actual watts of LED power per square foot for fruiting crops and 15 to 30 watts per square foot for leafy greens.
Here is an example power breakdown for a 4 x 4 foot tent:
| Device | Qty | Watts each | Subtotal watts |
|---|---|---|---|
| Full spectrum LED fixture | 1 | 480 | 480 |
| Air pump for DWC | 1 | 40 | 40 |
| Small water pump | 1 | 30 | 30 |
| Inline exhaust fan | 1 | 60 | 60 |
| Oscillating clip fans | 2 | 20 | 40 |
| Dehumidifier (small) | 1 | 250 | 250 |
| Total | 900 W |
At 120 V, 900 W uses about 7.5 amps. That is within the 12 amp safe target for a 15 amp circuit but leaves limited spare capacity for an additional tent on the same run.
Do you need dedicated circuits for your grow room?
A dedicated circuit is one that serves only the grow room and nothing else. For a single small tent and one light, an existing circuit may be enough as long as it is not shared with high draw appliances like heaters or window AC units.
Once total load exceeds about 900 to 1200 W in a single area, a dedicated 20 amp circuit becomes very helpful. For two or more tents or a full room build, many growers run two separate 20 amp circuits from the panel so lighting is on one and pumps, fans, and dehumidifiers are on another. This avoids a single tripped breaker shutting down both water and light at the same time.
Always follow local electrical codes and consult a licensed electrician if there is any uncertainty about capacity or wiring. This is especially important in older homes or converted garages.
How does climate and location affect power and layout?
Climate strongly affects both layout and electrical planning. In hot, dry regions like Phoenix and Peoria, Arizona, ambient summer temperatures can easily reach 100 to 115 degrees Fahrenheit. That heat adds to the load in garages and spare rooms and increases the need for cooling and humidity control.
A simple rule of thumb is that each watt of grow lighting produces roughly 3.4 BTU of heat per hour. A 900 W tent produces about 3000 BTU per hour. In a small, closed room, that often requires a portable AC or mini split sized appropriately. In dry climates, humidifiers may also run several hours per day, adding more power draw but helping plants thrive in 40 to 60 percent relative humidity.
What equipment do you need for a safe, efficient grow room?
A basic indoor hydro grow room typically includes:
- Hydroponic system
- Reservoirs with secure lids
- LED grow lights with proper hanging hardware
- Inline exhaust fan and ducting
- Carbon filter for odor control
- Oscillating fans for air movement
- Timers or smart plugs
- Power strips rated for the load, ideally with surge protection
- pH and EC meter, thermometer, and hygrometer
More advanced rooms add dehumidifiers, portable AC units, environmental controllers, and data logging sensors. In hydro heavy areas like Peoria and Phoenix, many growers also use water chillers for DWC systems during summer to keep solution temperatures under about 70 degrees Fahrenheit.
Complete hydroponic equipment checklist → beginner to advanced gear list
How do you control temperature, humidity, and airflow in the room?
Temperature control starts with lighting and insulation. Cool running LEDs make it easier to keep canopy temperatures between about 68 and 78 degrees Fahrenheit for leafy greens and 72 to 82 degrees for most fruiting crops.
Humidity is managed by balancing plant transpiration, room size, and exhaust or dehumidification. Young greens prefer around 50 to 70 percent relative humidity, while mature plants often do better around 40 to 60 percent. In very dry environments, a humidifier on a humidity controller helps reduce plant stress and tip burn.
Airflow has two parts: air exchange and air movement. An inline fan and vent provide air exchange, while oscillating fans keep leaves moving gently. Together they prevent stagnant air, reduce disease risk, and help control temperature and humidity evenly across the canopy.
Hydroponic nutrient and pH management → complete beginner guide
How do you manage noise, light leaks, and odor indoors?
Many apartment and urban growers need their hydro room to be discreet. Noise mainly comes from fans, pumps, and vibrating equipment. Rubber pads under pumps and reservoirs, insulated ducting, and quiet inline fans help keep sound levels manageable.
Light leaks are handled with tents or blackout curtains around closet doors. This matters most for flowering plants that need strict light schedules. Odor control relies on matching a properly sized carbon filter and inline fan to the total exhaust rate of the room or tent.
How do you keep your hydro room safe around water and electricity?
Water and electricity can coexist safely if wiring and equipment are planned accordingly. Several habits dramatically reduce risk.
- Use GFCI outlets or GFCI adapter strips for circuits near water
- Create drip loops on every cord so water runs away from outlets and timers
- Keep power strips mounted above floor level and away from reservoirs
- Use waterproof connectors and strain reliefs on pumps and lights where possible
It also helps to contain water within trays or pans large enough to catch spills. In Peoria and Phoenix style homes with slab floors, placing reservoirs in low trays can prevent minor leaks from spreading under baseboards or cabinets.
What are the most common layout and power planning mistakes to avoid?
Certain mistakes show up repeatedly in indoor hydro rooms.
- Overloading a single 15 amp circuit with multiple tents and a dehumidifier
- Placing reservoirs where they are hard to reach for cleaning and water changes
- Ignoring vertical space, resulting in plants growing into lights
- Running extension cords under carpets or through doorways where they can be damaged
- Skipping exhaust in the belief that LEDs alone will keep temperatures stable
- Forgetting space for mixing nutrients and storing tools, leading to clutter and spills
Avoiding these issues at the planning stage saves money and hassle later. A simple top view sketch with equipment labeled and wattages noted catches most of them before any holes are drilled or tents are assembled.
How-To: How do you create a basic indoor hydroponic grow room layout and power plan?
Title: Plan a simple indoor hydroponic grow room layout and power setup
Description: A step by step process for mapping out where to place your hydroponic systems, lights, and electrical loads in a small indoor grow space.
Materials and tools
- Tape measure
- Notepad or graph paper, or simple drawing software
- Pencil and eraser or digital equivalent
- Access to your breaker panel or circuit map
- Basic plug in power meter (optional but very helpful)
- List of planned equipment with their wattage ratings
Step 1: Measure and sketch your grow space
Measure the length, width, and height of the room, closet, or tent. Note the locations of doors, windows, existing outlets, and any obstacles such as water heaters or shelves. Draw a simple top down sketch to scale with these features marked.
Step 2: Decide which hydroponic systems and plants you will grow
Choose the system type and plant mix that fits your goals and space. For a first build, many growers pick DWC or NFT for leafy greens since they are forgiving and compact. Write down how many plant sites you want and the approximate footprint of each system.
Choosing the right hydroponic system for your space → system comparison for home growers
Step 3: Place systems, reservoirs, and aisles on the sketch
Draw rectangles for each system and reservoir on your sketch, keeping reservoirs on the floor line and systems slightly above. Leave at least 18 inches wherever you plan to walk or stand to work on plants. Ensure each reservoir has clear access for lid removal and cleaning.
Step 4: Add lighting positions and hanging heights
For each plant area, draw the intended coverage area of the LED fixtures on the sketch. Center lights over the plant zones with enough distance to adjust height as plants grow, usually 12 to 24 inches from canopy for many LEDs. Make sure fixtures will not hit ceiling fans or shelves and that cords can reach outlets without strain.
Step 5: List every electrical device and its wattage
Create a simple table listing lights, pumps, fans, heaters or chillers, humidifiers, dehumidifiers, and controllers. Use manufacturer labels or manuals to find the wattage of each. Add the wattages to find a total and then convert each circuit total to amps using amps=120watts.
Step 6: Map equipment to household circuits
Identify which outlets belong to which breaker in your panel by tripping each breaker briefly and checking which outlets lose power, if a map is not already available. Assign your equipment to outlets so that no single circuit exceeds about 80 percent of its amp rating. Whenever possible, keep critical devices such as air pumps and lights on different circuits so one tripped breaker does not shut everything down.
Step 7: Plan cable management, GFCI protection, and water containment
On your sketch, add planned locations for power strips, timers, and cord runs. Place GFCI outlets or adapters where red tagged water related devices will plug in. Include trays or pans under reservoirs and systems to catch spills, and plan drip loops on every cord to keep water from flowing toward outlets.
Step 8: Review for access, safety, and future expansion
Look over the full sketch and list. Confirm there is enough walkway space, that reservoirs and valves are reachable, and that no cord has to cross standing water paths. Consider where a second system, larger light, or extra fan might go in the future, and leave at least a little unused capacity on each circuit to allow for upgrades.
FAQ: Indoor hydroponic grow room layout and power
How much does it cost to power a small indoor hydroponic grow room?
A single 4 x 4 tent with a 480 W light and typical pumps and fans might use around 700 to 900 W while running. If lights and equipment run 16 hours per day for leafy greens, that is roughly 11 to 14 kWh daily. At a power cost of 0.12 dollars per kWh, that works out to about 40 to 50 dollars per month, depending on local rates and any extra cooling or dehumidification.
Is it safe to run hydroponic systems and electricity in the same room?
Yes, as long as basic safety steps are followed. Using GFCI outlets, drip loops on all cords, elevated power strips, and leak trays makes indoor hydro as safe as a kitchen or bathroom. Avoiding overloaded circuits and damaged extension cords also greatly reduces risk. Periodic inspections for salt buildup and corrosion on plugs keep connections reliable.
How hard is it to set up a grow room layout for a beginner?
The hardest part is often the initial planning, not the physical setup. With a simple sketch and a list of equipment, most beginners can assemble a small tent or closet grow in a weekend. Taking the time to think through access, cleaning, and power before buying gear prevents most beginner mistakes and makes daily use much smoother.
How long before plants are ready to harvest in an indoor hydro room?
For leafy greens like lettuce and basil, harvest can begin 4 to 6 weeks after seeding, and then every 1 to 2 weeks for cut and come again varieties. Faster herbs such as cilantro may be ready even sooner, while fruiting crops like tomatoes and peppers can take 8 to 12 weeks before the first ripe fruits. Indoor hydroponics often shaves 20 to 30 percent off the time to harvest compared to soil.
What are the biggest risks of a poorly planned hydro grow room?
The main risks are electrical overloads, heat buildup, and water leaks that are hard to access and clean. Poor layouts can also make it difficult to reach plants in the back, leading to uneven pruning and pest problems. In severe cases, neglected leaks can damage floors or walls, and repeated breaker trips can shorten the life of pumps and lights.
Can you run a hydroponic grow room in an apartment or rental?
Yes, many growers run small hydroponic tents or closet setups in apartments and rental homes. Focus on compact, low noise equipment, strong odor control with carbon filters, and good leak containment. It is also wise to avoid permanent changes to walls or wiring and to keep overall power use similar to a home office plus a small AC unit.
How do you know if your circuit is overloaded?
Frequent breaker trips or noticeably warm outlets are warning signs that a circuit is overloaded. A simple plug in power meter can show the watts being drawn by a light or power strip so you can add up the total more accurately. If the calculated amps approach or exceed about 80 percent of the breaker rating, it is time to move equipment to another circuit or upgrade the electrical service.
Do you really need a dehumidifier or AC in a small grow tent?
In cool, dry seasons, a small tent may run fine with lights and an exhaust fan alone. In hot climates or humid basements, however, temperatures and humidity can quickly climb into ranges that stress plants and encourage disease. Watching a thermometer and hygrometer over a few days of operation makes it clear whether a dehumidifier or portable AC is needed to stay in the ideal range.
What is the best lighting schedule for an indoor hydro grow room?
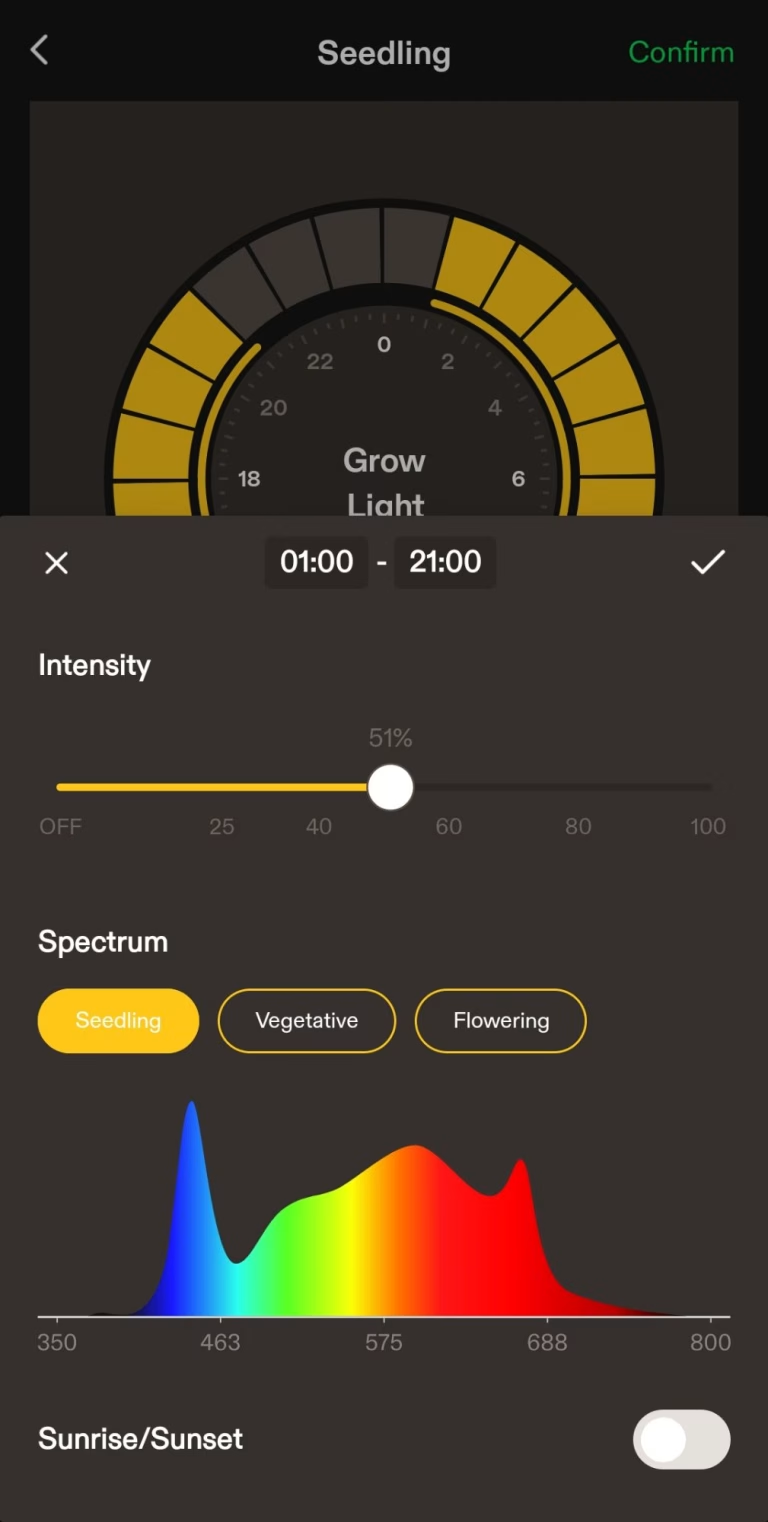
For leafy greens and most herbs, 14 to 18 hours of light per day works well, with 16 hours as a common middle ground. Fruiting crops like tomatoes and peppers typically run 18 hours in vegetative growth, then switch to 12 hours of light and 12 hours of dark to encourage flowering for some varieties. Timers or smart plugs make it easy to keep schedules consistent without daily manual switching.
Author note
This article is written from the perspective of an indoor grower based in Phoenix, Arizona, where hot, dry weather and intense sun make controlled environments especially valuable. Indoor hydroponic systems offer a way to grow greens and herbs year round in garages, spare rooms, and small apartments without relying on outdoor conditions. Experience with multiple tent sizes, system types, and power setups in this climate informs the focus on careful electrical planning and heat management. The goal is to provide practical, repeatable advice that home growers can use to design safe, efficient indoor hydroponic spaces of their own.
Share this:

Discover more from Soil Free Harvest
Subscribe to get the latest posts sent to your email.