Algae, Root Rot, and Clogs: The Holy Trinity of Hydroponic Problems
Picture this: You check your hydroponic system one morning, and everything looks perfect. By evening, you notice a slight green tinge in your reservoir. Two days later, your plants are wilting, your pump is struggling, and you are staring at brown, slimy roots wondering what went wrong. Welcome to the unholy trinity of hydroponic problems: algae, root rot, and clogs. These three troublemakers rarely travel alone. They feed off each other, creating a cascade of issues that can devastate your carefully cultivated garden faster than you can say “nutrient solution.” But here is the good news: once you understand how these problems interconnect and have the right emergency protocols in place, you can tackle them head-on and keep your hydroponic system running smoothly.
Affiliate Disclosure: This article contains affiliate links. If you purchase through these links, soilfreeharvest.com may earn a small commission at no extra cost to you.
Understanding the Holy Trinity: How These Problems Connect
The relationship between algae, root rot, and clogs is not coincidental. It is a destructive cycle that feeds on itself. Algae growth starts when light hits your nutrient-rich water, creating the perfect photosynthetic environment. As algae multiply, they consume oxygen and nutrients meant for your plants while releasing organic matter into your system. This organic matter becomes food for harmful bacteria and fungi, setting the stage for root rot.
Meanwhile, as algae colonies expand, they break apart and travel through your system, accumulating in pumps, drip lines, and emitters. Combined with mineral deposits from your nutrient solution, these algae fragments create stubborn clogs that restrict water flow. Reduced circulation means less oxygen reaches your plant roots, creating anaerobic conditions where root rot pathogens thrive. The cycle continues: root rot produces more organic debris, which feeds more algae, which creates more clogs. Understanding this interconnection is crucial because fixing just one problem without addressing the others is like bailing water from a sinking boat without patching the hole.
Algae: The Green Menace in Your System
Algae might look harmless at first, just a slight green tinge on your reservoir walls or a thin film on your growing medium. Do not be fooled. Even small amounts of algae can spiral into system-wide problems if left unchecked. Algae are microscopic organisms that exist as airborne spores practically everywhere. When these spores land in your nutrient-rich water and get exposed to light, they start reproducing rapidly, sometimes overnight.
The primary culprit behind algae growth is light exposure. Any crack, unsealed opening, or translucent material in your system becomes an invitation for algae to set up shop. Temperature plays a significant role too. Algae thrive in warm water, typically between 68°F and 86°F. As temperatures rise, their metabolism accelerates, leading to faster reproduction and more aggressive growth. This is why outdoor systems or those in warm grow rooms often battle persistent algae issues during summer months.
But algae do more than just look unsightly. They compete directly with your plants for nutrients, essentially stealing the nitrogen, phosphorus, and other elements you have carefully measured and added to your solution. Large algae blooms can also trigger pH imbalances, as their metabolic processes alter the acidity of your hydroponic solution. Rapid pH swings stress plants, disrupt nutrient availability, and can lead to deficiencies or toxicities that manifest as yellowing leaves, stunted growth, and poor yields. Additionally, algae contribute to system clogs by breaking off and traveling through your irrigation lines, accumulating in filters, emitters, and pumps.
Root Rot: The Silent Killer Lurking Below
Root rot is the nightmare scenario for hydroponic growers, and for good reason. It is often called a “silent killer” because by the time you notice above-ground symptoms like wilting or yellowing leaves, significant damage has already occurred below the waterline. Root rot is actually a blanket term covering various fungal and bacterial pathogens, including Pythium, Fusarium, and Rhizoctonia, that attack plant roots in oxygen-poor, waterborne environments.
The primary cause of root rot is inadequate oxygen in your nutrient solution. Plant roots need oxygen to function properly, and when dissolved oxygen levels drop too low, roots literally suffocate and begin to die. Dead root tissue becomes a breeding ground for pathogenic organisms that spread rapidly through your system. Water temperature is a critical factor here. Warm water holds less dissolved oxygen than cool water, and temperatures above 75°F create ideal conditions for root rot pathogens to multiply while simultaneously starving roots of the oxygen they desperately need.
Healthy hydroponic roots should be white, firm, and have a fresh smell. Root rot transforms them into brown, mushy, slimy appendages that emit a foul odor. You might also notice an oily brown film in your reservoir, on your filters, or coating your growing trays. Above ground, affected plants show signs of nutrient deficiency despite adequate feeding because damaged roots cannot absorb nutrients properly. You will see curling leaves, spotting, burning, chlorosis, wilting, and stunted growth. In flowering stages, root rot can cause buds to wither and die, devastating your harvest just when you are closest to success.
Clogs: The System Strangler That Stops Everything
If algae and root rot are the disease, clogs are the symptom that finally brings your system to its knees. Hydroponic clogs occur when debris, biofilm, mineral deposits, or algae accumulate in your irrigation lines, emitters, pumps, or filters, restricting or completely blocking water flow. This is especially problematic in drip systems and NFT (Nutrient Film Technique) setups where narrow passages and small openings are easily obstructed.
Clogs have multiple sources, and they often work together. Physical clogs come from solid particles like pieces of growing medium, root fragments, or debris that enters your system. Biological clogs result from biofilm formation, which happens when bacteria colonize surfaces inside your irrigation system and form slimy, protective layers that trap other particles. Chemical clogs occur when minerals in your water, particularly calcium, magnesium, and iron, precipitate out of solution and crystallize inside pipes and emitters. And of course, algae contribute significantly to clogging by breaking apart and traveling through your system as organic debris.
The danger of clogs extends beyond simple inconvenience. When water flow becomes restricted, your plants receive uneven nutrient distribution and suffer from water stress. Pumps work harder trying to push water through blocked lines, leading to overheating, reduced efficiency, and eventual pump failure. Some plants may get too much water while others get too little, creating inconsistent growth patterns across your system. In severe cases, complete blockages can cause entire sections of your garden to dry out and die within hours.
Advanced Troubleshooting Techniques for System Diagnosis
Advanced troubleshooting goes beyond simply reacting to visible problems. It involves systematic monitoring, diagnostic protocols, and preventive strategies that catch issues before they escalate. The first step is establishing a baseline for your system. Record your normal pH, EC (electrical conductivity), water temperature, and visual appearance when everything is healthy. These benchmarks become invaluable reference points when troubleshooting later.
Regular visual inspections are your first line of defense. Check for visible signs of algae buildup on reservoir walls, tubing, and growing medium. Look for discoloration in your nutrient solution, which should remain clear. Examine plant roots regularly for any brown, slimy, or mushy areas that indicate rot. Inspect all system components including pipes, pumps, injectors, and emitters for visible obstructions or accumulations. Pay special attention to filters and screens, where early-stage biofilm or algae may appear before becoming visible elsewhere.
Cross-monitoring multiple parameters reveals problems that single measurements might miss. For example, if your pH is dropping unexpectedly while your reservoir develops a slimy film, you likely have bacterial growth affecting your system chemistry. If your EC readings are rising despite not adding nutrients, evaporation or plant uptake imbalances may be occurring. Temperature fluctuations combined with reduced plant vigor often signal root oxygenation issues.
Advanced growers use several professional approaches to maintain system health. Installing flow meters helps detect clogs by showing reduced water movement before complete blockages occur. Using separate, dedicated pumps for circulation and aeration provides redundancy if one system fails. Implementing UV sterilizers or ozone generators can prevent pathogen proliferation, though these require careful management to avoid damaging beneficial organisms or system components. Some growers maintain backup reservoirs so they can quickly swap out contaminated solutions during emergencies.
For more detailed troubleshooting guides check out our previous post Hydroponic Problems and Solutions: How to Troubleshoot and Fix Common Issues
The Hydrogen Peroxide Solution: Your Chemical Ally
Hydrogen peroxide (H₂O₂) is one of the most versatile and effective tools in your hydroponic troubleshooting arsenal. It works through oxidation, with its extra oxygen molecule aggressively binding to and destroying bacteria, fungi, and algae cell structures. When hydrogen peroxide breaks down, it decomposes into plain water (H₂O) and free oxygen (O), which actually benefits your system by increasing dissolved oxygen levels that roots need to thrive.
The most important consideration with hydrogen peroxide is getting your concentration right. Most household hydrogen peroxide comes in 3% solutions, which are safe and easy to handle. For maintenance and minor issues, add 3 milliliters of 3% hydrogen peroxide per gallon of water in your reservoir. You can apply this treatment up to three times per week if needed. For treating established root rot or more severe problems, you can gradually increase to 10 milliliters of 3% hydrogen peroxide per gallon, though you should monitor plants closely for any signs of stress at higher concentrations.
If you are using food-grade hydrogen peroxide, which typically comes in 35% concentration, you must dilute it first before adding to your system. Mix one part of 35% hydrogen peroxide with eleven parts water to create a 3% solution. Always wear gloves when handling concentrated hydrogen peroxide as it will burn skin on contact. Never add concentrated hydrogen peroxide directly to your reservoir.
Application timing matters. Add hydrogen peroxide to your reservoir and let it circulate through your system for about 30 minutes before adding nutrients. This allows the peroxide to work against pathogens and stabilize before introducing other chemicals. Each dose lasts approximately four days before breaking down completely.
The main controversy around hydrogen peroxide involves its effect on beneficial bacteria. H₂O₂ kills both harmful and beneficial microbes indiscriminately. If you are running a sterile system focused on pathogen prevention, this is fine. However, if you are using beneficial bacteria products like Hydroguard, do not add hydrogen peroxide within 48 hours, as it will eliminate the beneficial microbes you paid for. You must choose: run sterile with hydrogen peroxide, or run with beneficial bacteria, but not both simultaneously.
Essential Cleaning Supplies Arsenal for System Maintenance
Having the right cleaning supplies on hand transforms emergency situations from disasters into manageable problems. Your hydroponic cleaning arsenal should include several categories of products, each serving specific purposes.
Start with food-grade hydrogen peroxide, ideally at 35% concentration that you can dilute as needed. This versatile cleaner sanitizes equipment, treats algae and root rot, and adds oxygen to your system. White vinegar is excellent for dissolving mineral deposits and hard water buildup in valves, tubing, and nozzles. Mix it 50/50 with water for cleaning between crop cycles, but never use it while plants are growing as it can harm them.
For deep cleaning between harvests, household bleach (sodium hypochlorite) is highly effective. Prepare a 10% solution by mixing one part bleach with nine parts water, then soak tools and equipment for at least 30 minutes. Critical warning: never mix bleach with other cleaning products, especially hydrogen peroxide or vinegar, as dangerous chemical reactions can occur. Always rinse thoroughly and allow surfaces to dry completely before reintroducing plants.
Isopropyl alcohol (70-100% concentration) works perfectly for sanitizing tools, shelving, lighting equipment, and any surfaces that contact your hydroponic system. Simply wipe surfaces with alcohol or dip tools in it. No rinsing is necessary after alcohol disinfection.
Your physical cleaning toolkit should include rubber gloves for protection, multiple sponges and scrubbers dedicated solely to hydroponic use, clean cloths or rags, several buckets for mixing solutions and catching drainage, and a small pitcher for precise pouring. For line cleaning, keep pipe cleaners or specialized brushes that fit your tubing diameter. A pressure washer attachment is invaluable for flushing stubborn clogs and cleaning large system components.
Consider specialized hydroponic cleaners like enzymatic products designed specifically for biofilm breakdown. These enzymes break down organic matter deep inside emitter components where oxidizing agents cannot reach effectively. Products like Drip Clean prevent clogs from forming by keeping minerals in solution rather than allowing them to precipitate.
Store all cleaning supplies in a dedicated area away from nutrients and plant materials. Label everything clearly and keep manufacturer instructions handy. Replace sponges and cloths regularly to prevent them from becoming contamination sources themselves.
Light-Blocking Materials and Techniques That Work
Preventing light from reaching your nutrient solution is one of the most effective algae prevention strategies available. Since algae require light for photosynthesis, eliminating light exposure removes one of the three essential ingredients they need to survive.
Start with your reservoir. Black plastic reservoirs provide excellent light blocking while pale-colored ones can still allow light penetration unless the plastic is very thick. If you are using a translucent reservoir, wrap it completely with black plastic sheeting, reflective Mylar, or aluminum foil. For outdoor systems, consider painting reservoir exteriors with reflective white paint to deflect heat while keeping interiors dark. This dual approach prevents both light penetration and temperature increases that promote algae growth.
Reservoir covers are essential. Use opaque lids that fit snugly with no gaps where light can enter. Active Aqua and similar manufacturers make purpose-built reservoir covers with ribbed designs for strength, convenient access portholes, and multiple drill points for installing meters and pump cords. Cover any unused plant holes in your grow trays or insert empty grow pots to block light transmission into your system.
For growing medium, specialized block covers provide double benefits. These dual-purpose covers are black on one side to block light and white on the other to reflect light back toward your plants. Place them black-side-down over rockwool blocks, coco coir, or other media to prevent algae from colonizing the surface. For smaller applications, you can cut squares of panda film (black and white plastic sheeting) to cover exposed growing areas.
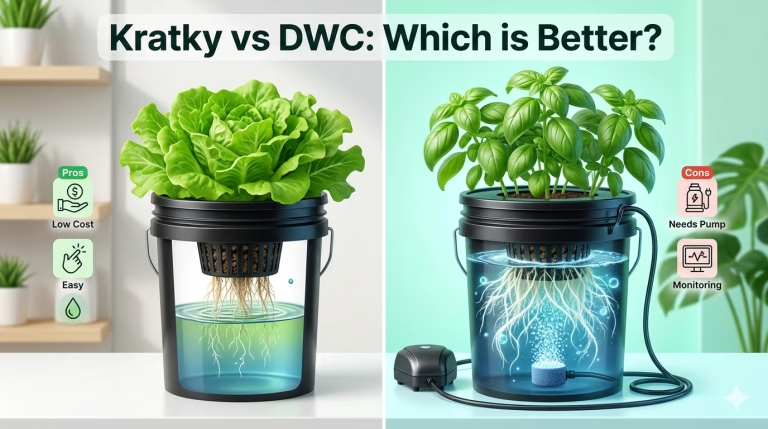
Net pot covers, sometimes called light guards or root guard lids, fit over net pots to prevent light from entering around plant stems. These simple additions dramatically reduce algae formation in deep water culture (DWC) and similar systems where roots are directly exposed to the reservoir.
For DIY solutions, emergency Mylar blankets (the gold foil blankets from first aid kits) work surprisingly well. They block light completely, provide excellent insulation to keep water temperatures stable, and cost very little when purchased in bulk. Wrap them around reservoirs and secure with clear shipping tape. reddit
Remember that even small light leaks can cause problems over time. To check for leaks, turn off your grow lights and use a bright flashlight to inspect your system from all angles, especially from below looking up. Any visible light penetration needs to be sealed.
Emergency Troubleshooting Guide: Fast Action Protocols
Hydroponic emergencies demand immediate action because problems escalate rapidly when plants depend entirely on your system for survival. Having an emergency protocol and supplies ready beforehand makes the difference between saving your crop and watching it fail.
Your emergency supplies kit should include backup pumps and air stones, extra tubing and fittings in common sizes, spare grow pots and growing medium, emergency nutrients pre-measured for quick mixing, pH up and pH down solutions, hydrogen peroxide for emergency treatment, clean buckets for temporary plant holding, a backup reservoir or large containers, duct tape and waterproof sealants, mesh tape for temporary repairs, and a good flashlight for system inspection.
When disaster strikes, follow these quick assessment protocols. First, check your pumps. Are they running? Is water flowing properly? If not, unplug pumps immediately and check for clogs using a pipe cleaner. Clear any debris from intake vents and hoses. If a pump has failed completely, swap in your backup immediately while you diagnose the problem.
Second, test your nutrient solution. Check pH and EC levels right away. If pH has drifted significantly outside the 5.5-6.5 range, plants cannot absorb nutrients properly even if everything else is perfect. Adjust pH immediately and monitor every few hours until stable. If EC is extremely high, you may have salt buildup requiring an emergency flush. If EC is very low, plants are starving and need nutrients added promptly.
Third, inspect for visible contamination. Look at your reservoir contents. If the solution is cloudy, has an odor, shows algae growth, or contains visible debris, you need to do an emergency reservoir change. Do not just top off contaminated water hoping the problem will fix itself.
For emergency root rot intervention, remove affected plants from the system immediately to prevent spread. Trim away brown, slimy roots using sterilized pruners, keeping only healthy white tissue. Prepare a hydrogen peroxide treatment bath using 10 milliliters of 3% hydrogen peroxide per gallon of water and soak affected roots for 30 minutes. Meanwhile, drain and clean your reservoir completely. Refill with fresh nutrient solution and add hydrogen peroxide at maintenance levels (3 milliliters per gallon) before returning plants to the system.
For emergency clog clearing in irrigation lines, detach affected sections if possible and flush them with warm water under high pressure. If clogs persist, soak lines in a vinegar solution (50/50 with water) for several hours to dissolve mineral deposits. For organic blockages, a diluted bleach solution can clear algae and debris, but you must flush lines thoroughly multiple times before reconnecting to your system. Always have spare tubing ready so you can swap out clogged lines immediately and clean them offline without disrupting your entire system.
For algae blooms, do an immediate partial water change, removing at least 50% of contaminated solution. Scrub all visible algae from reservoir walls, tubing, and components using hydrogen peroxide solution. Cover all light leaks immediately, even using temporary solutions like aluminum foil or black plastic bags until proper covers can be installed. Add hydrogen peroxide to the new nutrient solution at treatment levels and increase aeration.
Temperature emergencies require fast action too. If your reservoir temperature exceeds 75°F and you are seeing stress symptoms, you need to cool it quickly. Add frozen water bottles to the reservoir, but place them in sealed containers first so melting ice does not dilute your nutrient solution. Increase shade over the reservoir using temporary covers, emergency blankets, or even beach umbrellas. Position fans to blow across the reservoir surface, promoting evaporative cooling. For longer-term solutions, consider adding a water chiller or increasing reservoir size to better resist temperature fluctuations.
Emergency Solutions Post-Problem: Recovery and Prevention
Once you have stabilized an emergency, proper recovery procedures prevent immediate relapse and set you up for long-term success. The post-problem period is actually when most growers fail because they resume normal operations too quickly without addressing underlying causes.
Start with a complete system flush. Flushing systematically purges accumulated salts, residues, and contaminants from your reservoir and root environment. Drain all nutrient solution from your system completely. Clean the reservoir thoroughly using appropriate cleaning solutions, then rinse multiple times with fresh water. Prepare a flushing solution using pH-balanced water, or use a commercial flushing agent designed to remove excess salts and organics. Run this flushing solution through your entire system for 30 minutes to 2 hours, allowing it to displace accumulated debris. Drain the flushing solution completely. Rinse the system again with clean water. Only after thorough flushing should you refill with fresh nutrient solution.
Inspect and clean all system components individually. Remove and disassemble pumps, checking impellers for debris and biofilm. Clean all tubing, either by flushing with high-pressure water or replacing sections that show heavy buildup. Replace any filters or screens that appear clogged or dirty. Check emitters and drippers, soaking them in vinegar solution if mineral deposits are present. Sanitize growing containers, trays, and lids using hydrogen peroxide or appropriate disinfectants.
For root recovery, patience is essential. Plants that have experienced root rot need time to regenerate healthy root systems. Reduce nutrient strength temporarily by 25-50% to avoid stressing already-compromised roots. Monitor new root growth daily, looking for white, firm roots replacing damaged tissue. Maintain optimal dissolved oxygen by keeping water temperatures between 65-70°F and using air stones continuously. Consider adding beneficial bacteria products once you are certain all pathogens are eliminated and you are not using hydrogen peroxide.
Establish a prevention-focused maintenance schedule going forward. Daily tasks should include checking water levels and topping off as needed, measuring and adjusting pH, verifying EC levels, and doing quick visual inspections for algae or other issues. Weekly tasks include cleaning pre-filters and screens, inspecting plant roots, checking all tubing connections for leaks, and testing pump function. Every 2-4 weeks, do a complete reservoir change with thorough cleaning. Monthly tasks should include deep cleaning all removable components, checking and calibrating meters, and inspecting the entire system for wear or damage.
Document what went wrong and what you did to fix it. Take photos of problems and solutions. Record water parameters before, during, and after incidents. Note which treatments worked and which did not. This documentation becomes invaluable for preventing future problems and troubleshooting faster when issues recur.
Maintaining Your System: Prevention Beats Emergency Response
The holy trinity of hydroponic problems, algae, root rot, and clogs, might seem overwhelming at first, but armed with knowledge and the right tools, you can keep these troublemakers in check. Remember that these problems rarely exist in isolation. They feed off each other, creating cascading failures that can devastate your system if not addressed quickly and completely. Your best defense is always prevention through proper system design, regular maintenance, and vigilant monitoring.
Keep your reservoirs covered and light-proof to starve algae of the illumination they need. Maintain optimal water temperatures between 65-70°F to maximize dissolved oxygen and minimize pathogen growth. Stock your emergency supplies now, before disaster strikes. Know your hydrogen peroxide concentrations and application rates. Clean your system regularly rather than waiting for problems to develop. And most importantly, check your system daily so you catch small issues before they become catastrophic failures.
Hydroponic growing offers incredible rewards, from faster growth rates to higher yields and year-round production. But it demands attention and proactive care. Master the troubleshooting techniques covered here, keep your cleaning supplies stocked, and develop the habit of daily system checks. Your plants will reward your diligence with healthy growth, bountiful harvests, and far fewer middle-of-the-night emergency repair sessions. Happy growing, and may your roots stay white, your water stay clear, and your pumps keep flowing!
Useful Resources:
- https://extension.okstate.edu/fact-sheets/algae-control-for-greenhouse-production.html
- https://extension.psu.edu/hydroponics-systems-and-principles-of-plant-nutrition-essential-nutrients-function-deficiency-and-excess/
- https://ashs.org/news/607318/Using-Hydrogen-Peroxide-to-Control-Algae-in-Hydroponic-Systems.htm
- https://www.etsy.com/market/hydroponic_algae_covers
- https://cfaes.osu.edu/stories/researcher-works-stop-pathogens-growing-in-your-salad
- https://pmc.ncbi.nlm.nih.gov/articles/PMC11548230/
- https://lgpress.clemson.edu/publication/micro-irrigation-system-maintenance-to-prevent-clogging/
- https://scholarworks.utrgv.edu/cgi/viewcontent.cgi?article=2718&context=etd
- https://extension.psu.edu/strategies-for-preventing-algae-and-aquatic-plant-problems-in-farm-ponds/
Share this:

Discover more from Soil Free Harvest
Subscribe to get the latest posts sent to your email.