Reverse Osmosis Water, Tap Water, or Collected Rainwater? The Hydroponic Grower’s Water Choice Guide
Quick Answer
The best water source for hydroponics depends on your system size, location, and plant type. In Phoenix’s hard water environment, reverse osmosis gives you predictable nutrient control but costs $0.05-$0.15 per gallon. Tap water is free but mineral-heavy, forcing you to manage EC carefully. Rainwater is soft and ideal but unreliable in drought-prone Arizona. Most serious Phoenix-area growers use a hybrid approach: RO water for precise systems, tap water for leafy greens in cooler months, and rainwater as supplemental when available. This article has some comparisons between Arizona and Michigan water sources to demonstrate the difference in water quality.
TL;DR: Start with tap water and an EC monitor if you’re a beginner with leafy greens. Switch to RO if you’re growing fruiting crops (tomatoes, peppers) or running a system larger than 20 gallons. Rainwater collection is a smart long-term investment in Arizona but not reliable as your only source.
Water Source Comparison for Hydroponics: Phoenix, AZ vs. Grand Rapids, MI
Choosing the right water source can mean the difference between a thriving garden and nutrient lockout, algae blooms, and failed harvests. This guide breaks down real water quality data from two vastly different regions and shows you exactly how each option performs in practice.
Understanding Your Local Water: Phoenix Hard Water Reality
If you live in Phoenix, Arizona, your tap water is significantly harder than most of North America. The 2024 City of Phoenix Water Quality Report shows total hardness of 158 to 344 ppm (measured as 9.2 to 20.1 grains per gallon). By comparison, the EPA’s “very hard” category begins at 180+ ppm. Your water also contains 560 to 686 ppm of total dissolved solids (TDS), which exceeds the EPA’s recommended secondary standard of 500 ppm. This means your tap water already carries a baseline electrical conductivity (EC) of approximately 0.6 to 0.9 mS/cm before you add a single nutrient. In hydroponics, where precise nutrition is everything, that matters profoundly.
Grand Rapids, Michigan, by contrast, sources its water from Lake Michigan and maintains lower hardness levels. While both cities add chlorine for disinfection, Phoenix’s water carries dissolved minerals that accumulate in your reservoir over time, creating nutrient imbalances and salt buildup.
Tap Water for Hydroponics: When Free Is Good Enough
The Appeal: Zero Equipment Cost
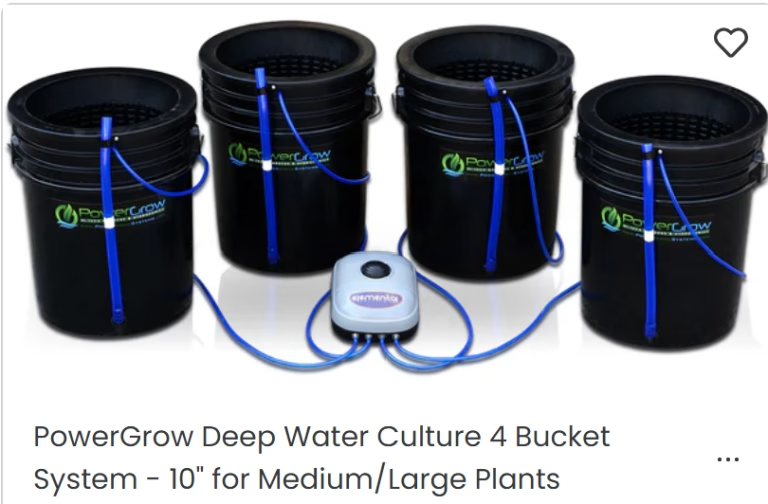
Tap water is accessible, requires no equipment beyond your system itself, and costs nothing. Many beginners start here, and that’s not a mistake. If you’re growing leafy greens like lettuce, spinach, or arugula in a simple 5-gallon deep water culture bucket with basic nutrients, tap water works. Leafy greens are forgiving crops that tolerate moderate mineral content and don’t demand the precise nutrient ratios that fruiting plants require.
The Phoenix Challenge: Mineral Buildup and Nutrient Interference
In Phoenix, tap water’s high calcium and magnesium content accumulates in your reservoir. After three to four weeks of evaporation and nutrient uptake, minerals precipitate out, coating air stones, pump impellers, and root zones. This reduces oxygen transfer and creates visual clogs. More critically, the mineral load interferes with nutrient availability. When your tap water contributes 0.6 mS/cm of conductivity on its own, you have only about 1.0 mS/cm of “headroom” before you hit the 1.6 mS/cm maximum for sensitive herbs like basil. You’re also locked into adding nutrients to meet plant demand after the tap water has already supplied calcium and magnesium. This often forces you to:
- Use chelated iron supplementation more frequently (because high pH water reduces iron availability)
- Adjust pH more aggressively (tap water pH typically 7.3-8.3, while most plants prefer 5.5-6.2)
- Change water more often to avoid salt accumulation
In places like Grand Rapids, Michigan, the same tap water approach is less stressful because base mineral content is lower, giving you more EC flexibility.
Chlorine and Chloramine: The Disinfection Problem
Both Phoenix and Grand Rapids use chlorine or chlorine dioxide to disinfect tap water. Phoenix reports chlorine levels up to 1.95 ppm. Chlorine and chloramine both inhibit beneficial bacteria and can stress roots. Many growers address this by letting tap water sit uncovered for 24-48 hours, allowing chlorine to off-gas, before adding it to their systems. This adds time and labor. Some use activated carbon filters to remove chlorine instantly.
Tap Water Pros and Cons
Pros:
- Zero cost per gallon
- Accessible immediately
- Safe for drinking, so it’s been treated for pathogens
- Works fine for leafy greens and low-sensitivity plants
Cons:
- Phoenix tap water is very hard, narrowing your nutrient control margin
- Mineral and salt accumulation fouls equipment and limits flexibility
- Chlorine/chloramine requires off-gassing time
- May require more frequent water changes
- pH too high for optimal nutrient availability
- Not ideal for fruiting crops, which demand precise nutrient ratios
Best Use Case: Tap Water
Tap water is best for beginners with small systems (under 5 gallons), growing forgiving leafy greens, in cool months when evaporation is lower and mineral precipitation is slower. If you live in Grand Rapids, tap water is a more viable long-term option than in Phoenix.
Cost for Tap Water
Initial investment: $0 (water itself)
Equipment: Optional EC meter ($15-$40) and pH test strips ($10-$20)
Ongoing: $0
Effort: Daily mineral monitoring, frequent adjustments
Reverse Osmosis Water: The Serious Grower’s Choice
Why RO Works for Hydroponics
Reverse osmosis removes nearly all dissolved solids, producing water with an EC of 0.0 to 0.1 mS/cm. This demineralized water is a blank slate. You control exactly what nutrients go into your system without fighting pre-existing minerals. Fruiting crops like tomatoes, peppers, and cucumbers demand EC levels of 1.8 to 2.8 mS/cm, and they’re sensitive to calcium-to-potassium ratios, magnesium availability, and micro-nutrient balance. With RO water, you make all those decisions rather than having them constrained by your tap water composition.
For growers running systems larger than 20 gallons, or those scaling to multiple systems, RO eliminates the nutrient lockout problems that plague tap water operations. It also prevents mineral precipitation, keeping air stones, pumps, and sensors cleaner over longer periods.
RO Equipment: What You’ll Actually Pay
Countertop and under-sink RO systems for home use range from $100 to $600, with most practical hobby-grade systems running $200 to $400. Hydroponics-specific models (75 to 150 gallons per day) cost $115 to $280. Professional installation adds $100 to $500, but most home growers install these themselves using standard plumbing connections. Membrane replacement (the core consumable) typically costs $50 to $100 and lasts 2 to 5 years depending on water quality and usage.
A typical 100-gallon-per-day unit uses about 40 watts and costs roughly $10 to $20 per month in electricity. Critically, home RO systems operate at 3-to-1 waste ratio: for every gallon of product water, 3 gallons go down the drain. This water isn’t wasted in a hydroponic context; you can use it for outdoor plants, lawn, or garden, but it’s important to understand the volume.
Production Speed and System Constraints
A 100 GPD RO system produces about 1.4 gallons per hour. If you’re filling a 50-gallon reservoir, the system runs for roughly 36 hours. If you’re on a daily top-off schedule, production keeps pace. But for large operations or emergency water needs, RO speed becomes a limiting factor. Some growers size up to 150 or 200 GPD systems, but costs climb accordingly.
RO Water Cost Over Time
Let’s quantify it. A 100 GPD system producing 2,400 gallons per month (including waste) consumes electricity worth roughly $15-$18 per month. Membrane and filter replacement, amortized over 5 years, adds roughly $8-$12 per month. Add tap water at $1-$2 per 1,000 gallons, and your all-in cost lands at $0.08 to $0.15 per gallon of finished product water. For a small hobby system (50 gallons per week), that’s $4 to $8 per week. For a serious grower running 500 gallons weekly, costs are $40 to $75 per week, but you gain unmatched control.
Drawbacks and Maintenance
RO systems require annual prefilter replacement (sediment, carbon, often $30-$60 total) and occasional membrane cleaning or replacement. In areas with very hard water like Phoenix, sediment and carbon filters clog faster, requiring more frequent replacement. RO also produces slightly acidic water (pH 5.5-6.0) because it removes buffering minerals. Some growers add a small amount of tap water back, or add a trace of baking soda, to stabilize pH. This hybrid approach, called “blending,” gives you controlled water quality without full RO costs.
RO Pros and Cons
Pros:
- Precise nutrient control; no mineral interference
- Eliminates chlorine completely (membranes block it)
- Prevents salt accumulation and equipment fouling
- Scales well for medium and large systems
- Ideal for fruiting crops and nutrient-sensitive plants
- Long-term cost is reasonable for dedicated growers
Cons:
- Higher upfront equipment cost ($200-$500)
- Slow production (100-150 GPD for home units)
- 3-to-1 waste water ratio (though usable elsewhere)
- Requires annual maintenance and filter replacement
- Produces slightly acidic water (minor adjustment needed)
- Overkill for small beginner leafy green systems
Best Use Case: RO Water
RO is best for systems 20 gallons or larger, fruiting crops (tomatoes, peppers, eggplant), growers scaling multiple systems, and anyone in a hard-water region like Phoenix who wants to avoid nutrient lockout. The investment pays for itself in reduced troubleshooting and increased yield within 2-3 months of consistent growing.
Cost for RO Water
Initial investment: $200-$500 (equipment)
Monthly operating cost: $15-$25 (electricity + filter replacement)
Per-gallon cost: $0.05-$0.15
Effort: Annual maintenance, quarterly filter checks
Rainwater Collection: Free, Soft, and Unpredictable in Arizona
The Appeal: Soft, Clean, Cost-Effective
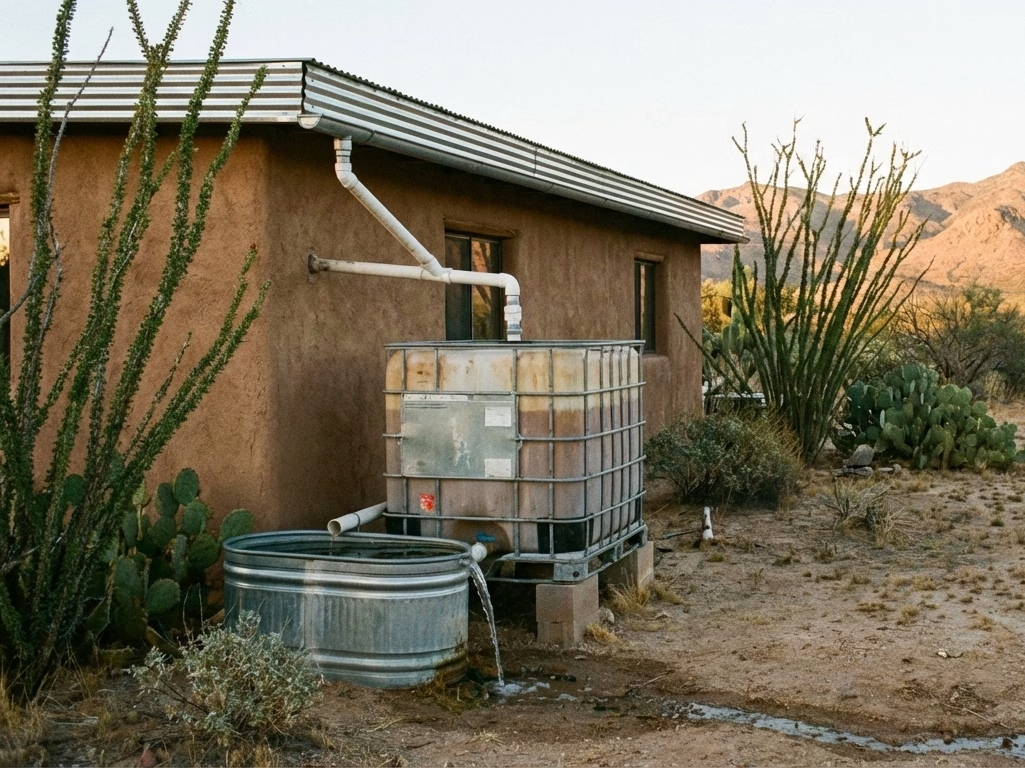
Rainwater has an EC close to 0.0 mS/cm and arrives soft and free of municipal disinfectants. In climates with reliable precipitation, rainwater collection is a no-brainer. You capture runoff from your roof, filter it, store it, and use it. No electricity, no waste, and the softness means you have the full EC range available for nutrient dosing. Leafy greens, herbs, and fruiting crops all thrive on rainwater when nutrients are managed properly.
The Arizona Reality: Drought and Seasonal Scarcity
Here’s the problem for Phoenix growers: Arizona averages only 9.2 to 9.5 inches of rain per year. Compare that to the U.S. average of 38 inches (Grand Rapids approaches this figure). In 2025, Phoenix ranked as the 44th wettest year on record in terms of annual precipitation, which sounds good until you realize most years fall well below average. Monsoons (July through September) are increasingly unreliable, with some years producing only 3 to 4 inches total.
For rainwater collection math: a typical residential roof of 2,000 square feet captures about 1,250 gallons per inch of rain. If Phoenix receives 10 inches spread across the entire year, that’s 12,500 gallons annually, or roughly 34 gallons per day on average. In reality, rain clusters into just a few storms. You might collect 1,000 gallons in July, nothing in August, then 500 gallons in September. Storage capacity must bridge dry periods.
This means rainwater is best viewed as a supplemental source, not a primary one. A small rain barrel (50-100 gallons) tops off your system during monsoon season but won’t sustain a 50-gallon system through the 8-month dry season.
Contamination and Filtration Requirements
Before you use rainwater, you must filter it. Roof surfaces accumulate bird droppings, dust, leaves, and metal particulates from gutters and downspouts. The first flush of a storm washes these contaminants into your collection tanks. Most systems use a first-flush diverter (mechanical valve that discards the initial water), followed by sediment filtering (25 to 100 microns), activated carbon filtering (to remove odor and some organics), and optionally UV or fine particulate filtering.
A complete rainwater filtration system costs $200 to $500 for DIY installation. If you hire a professional, add $500 to $1,500 in labor. Annual maintenance (filter replacement and tank cleaning) runs $300 to $800 depending on how much rain you collect.
Storage: The Critical Bottleneck
Tanks for rainwater range from basic 50-gallon rain barrels ($100-$300) to underground cisterns holding thousands of gallons ($3,000-$20,000). A serious Arizona grower aiming for year-round supplemental rainwater needs at least 500 gallons of storage to bridge the dry season. A 500-gallon tank costs $500-$1,500 installed, plus filtration and plumbing.
Rainwater and Water Chemistry
Rainwater is excellent for hydroponic plants from a chemistry standpoint. It’s soft, lacks chlorine, and has low EC. However, it can occasionally carry nitrogen (from atmospheric fixation), which can skew nutrient ratios if you’re not monitoring EC and adding balanced nutrients. Most growers treat rainwater exactly like RO water: as a blank slate where they control everything via nutrient solution.
Rainwater Pros and Cons
Pros:
- Zero ongoing cost per gallon
- Soft water, ideal for nutrient control
- No chlorine or municipal disinfectants
- Environmentally aligned (reduces municipal water use)
- Works well combined with RO or tap water
Cons:
- Extremely unreliable in Arizona (9-10 inches/year)
- Requires filtration system ($200-$500)
- Storage tanks necessary ($500-$2,000+)
- Annual maintenance and filter replacement ($300-$800)
- Contamination risk if filtration fails
- Supplemental only; can’t sustain a system year-round in Phoenix
Best Use Case: Rainwater Collection
Rainwater is best as a supplemental source in Arizona, topping off systems during the rare monsoon season (July-September) rather than serving as the primary supply. In regions like Grand Rapids with 38+ inches annually, rainwater collection becomes much more viable as a primary or co-primary source.
Cost for Rainwater Collection System
Initial investment: $1,000-$2,500 (tank + filtration + basic installation)
Annual maintenance: $300-$800 (filter replacement, tank cleaning)
Per-gallon cost: $0 to $0.05 (depending on maintenance allocation)
Effort: Annual system maintenance, quarterly filter checks, seasonal emptying
Water Quality Comparison Matrix: Phoenix vs. Grand Rapids
| Parameter | Phoenix Tap | Grand Rapids Tap | RO Water | Rainwater |
|---|---|---|---|---|
| Total Hardness | 158-344 ppm (Very Hard) | 80-120 ppm (Hard) | 0-10 ppm (Soft) | 0-5 ppm (Very Soft) |
| TDS (Total Dissolved Solids) | 560-686 ppm | 200-300 ppm | 0-50 ppm | 0-30 ppm |
| Baseline EC | 0.6-0.9 mS/cm | 0.3-0.5 mS/cm | 0.0-0.1 mS/cm | 0.0-0.05 mS/cm |
| Chlorine Content | 0.17-1.95 ppm | 0.3-3.5 ppm | 0 ppm (removed) | 0 ppm |
| pH | 7.3-8.3 | 6.8-7.5 | 5.5-6.0 | 5.8-6.8 |
| Calcium + Magnesium | Very High | Moderate | Minimal | Minimal |
| Cost per Gallon | $0 | $0 | $0.05-$0.15 | $0-$0.05 |
| Best for | Leafy greens, small systems | All crops, larger systems | Fruiting crops, precise control | Supplemental, any crop |
| Setup Cost | $0-$60 | $0-$60 | $200-$500 | $1,000-$2,500 |
Real-World Scenarios: Which Water Source Should You Choose?
Scenario 1: Small Hobby System (5-Gallon Deep Water Culture Bucket)
Goal: Grow basil, lettuce, or microgreens for personal use
Location: Phoenix
Best Choice: Tap water with an EC monitor
Use tap water directly, but let it sit uncovered for 24-48 hours to off-gas chlorine. Invest $30 in an EC/TDS meter and $20 in pH test strips. Change the water every 3-4 weeks to prevent salt accumulation, or use a simple carbon filter to remove some of the mineral load. Cost: $50 initial, $0 ongoing for water.
Why not RO? The $200-$500 equipment investment isn’t justified for a single small system. RO shines at larger scales.
Why not rainwater? Storage and filtration would cost more than the system itself.
Scenario 2: Medium System (20-30 Gallons, Multiple Crops)
Goal: Grow herbs, leafy greens, and one fruiting crop (like peppers)
Location: Phoenix
Best Choice: Reverse osmosis water
A medium system justifies the RO investment. With RO water at 0.0-0.1 mS/cm, you can dose nutrients precisely for peppers (target EC 1.8-2.8 mS/cm) without interference from tap water’s 0.6-0.9 baseline. RO eliminates the mineral accumulation problems that plague Phoenix tap water at this scale. Cost: $300 equipment plus $15-$20 per month for electricity and filters equals about $0.10 per gallon.
Why not tap water? At 20-30 gallons, mineral buildup becomes a real headache within 4-6 weeks. You’ll spend time troubleshooting pH and EC instead of growing.
Hybrid option: If budget is tight, use tap water for a herb tower (forgiving) and RO water for a separate pepper system, splitting the water collection duty.
Scenario 3: Larger System (50+ Gallons, Commercial or Serious Hobbyist)
Goal: Year-round production of multiple crops, scaling toward commercialization
Location: Phoenix
Best Choice: RO water, supplemented with rainwater collection when available
At this scale, RO is mandatory for Phoenix. Tap water’s mineral burden becomes unmanageable; you’d spend 20% of your time fighting EC and pH rather than optimizing growth. A 150 GPD RO system ($300-$400) pays for itself in two months through eliminated troubleshooting and improved yields. Pair it with a modest rainwater collection system (500-gallon tank, $1,500 installed) to capture monsoon runoff. The rainwater reduces your monthly RO consumption by 10-20% during wet months, and your irrigation system supports your outdoor landscape in dry months. Cost: RO at $0.10 per gallon for primary supply, rainwater cost amortized to near-zero over 5 years.
Why this hybrid? RO guarantees consistency; rainwater saves money and adds sustainability value. Together, they’re unbeatable.
Hybrid Approach: The Arizona Grower’s Optimal Strategy
After years of hydroponics in Phoenix’s hard-water climate, many experienced growers adopt a three-part hybrid system:
Summer (April-October): Use RO Water
During hot months, evaporation accelerates, concentrating minerals faster. Cooling costs spike, and nutrient demand increases. RO water gives you the precise control needed. Pair it with supplemental rainwater during monsoons (July-September) to offset RO production time and cost.
Winter (November-March): Use Tap Water for Leafy Greens
When temperatures drop, evaporation slows and cooling load decreases. Mineral accumulation is slower. Use tap water for cool-weather crops like lettuce, spinach, and arugula, which tolerate mineral variation. Monitor EC closely and change water every 4 weeks instead of 3.
Year-Round: Capture Rainwater When It Falls
Even though Arizona rain is unreliable, maintain a 200-300 gallon collection system with proper filtration. During monsoon season, you’ll collect enough to top off systems 1-2 times per month. This offsets RO production and expense while building a buffer against drought.
Benefits of the Hybrid Approach
- Cost efficiency: RO handles the challenging crops and high-demand months; tap water handles the forgiving crops
- Sustainability: You reduce municipal water consumption and add a resilience layer via rainwater
- Flexibility: You adapt to seasonal availability and adjust water sources without system failures
- System resilience: If one supply fails (pump breaks, filter clogs), two others keep systems running
Equipment Setup: How to Implement Each Water Source
Setting Up Tap Water with Monitoring
- Install a carbon filter inline before your reservoir (optional but recommended) to reduce chlorine and some minerals. Cost: $25-$50, replacement every 3-6 months.
- Invest in an EC/TDS meter (digital, $20-$40) and pH test strips ($10-$20).
- Let tap water sit 24-48 hours before use, or bubble it with an air stone to off-gas chlorine faster.
- Change reservoir water every 3-4 weeks.
Time investment: 10 minutes per water change, 5 minutes per day for monitoring.
Setting Up Reverse Osmosis Water
- Choose a system based on your GPD needs (typically 75-150 GPD for hobby systems). Cost: $150-$400 for equipment.
- Install under your kitchen sink or in a utility space. Most units connect to a single tap and drain, fitting standard plumbing. Cost: $100-$300 for professional installation (optional).
- Prefilter replacements (sediment + carbon) annually cost $30-$60; membrane replacement (2-5 years) costs $50-$100.
- Store finished RO water in food-grade containers or run it directly to your system if space allows.
Time investment: 30 minutes installation, 15 minutes quarterly maintenance, 5 minutes per month monitoring.
Setting Up Rainwater Collection
- Decide on tank size based on roof square footage and seasonal rainfall. For Peoria (9.5 inches/year), a 300-500 gallon tank is practical.
- Install gutters and downspouts with a first-flush diverter. Cost: $800-$1,500.
- Install the tank on a level, shaded surface. Cost: $500-$1,500 (DIY) or $2,000-$4,000 (professional).
- Add filtration (sediment + carbon). Cost: $200-$400.
- Connect a gravity-fed or pumped line to your hydroponic system. Cost: $100-$300.
Time investment: 2-3 hours installation, 1 hour quarterly maintenance, 30 minutes per season for tank cleaning.
Frequently Asked Questions: Water Source Concerns and Solutions
Will my tap water kill my plants?
No. Tap water won’t kill your plants, but in Phoenix it will constrain your options and cause frustration with established systems over time. Mineral accumulation leads to pH drift, reduced oxygen transfer, and nutrient lockout. For small systems with leafy greens, tap water works fine. For anything larger or more demanding, it becomes a limiting factor.
Nutrient Lockout in Hydroponics: → nutrient guide
Is reverse osmosis water worth the cost?
For systems larger than 20 gallons or crops more demanding than lettuce, yes. The RO investment ($200-$400) pays for itself within 3-4 months through reduced troubleshooting, fewer water changes, and healthier plants. If you’re growing peppers, tomatoes, or running multiple systems, RO is nearly essential in Phoenix. For a single 5-gallon bucket of basil, no.
Can I use well water for hydroponics?
If you have a private well, test it. Well water often has similar hardness issues to Phoenix municipal water, sometimes worse. If hardness exceeds 200 ppm, treat it like Phoenix tap water: monitor closely, change frequently, or consider RO. Some wells have iron or sulfur content that makes them unsuitable without filtration.
Testing Water Quality for Hydroponics → water quality testing
How do I store RO water without it growing algae?
RO water is susceptible to algae and bacterial growth because it lacks minerals and chlorine. Store it in opaque, food-grade containers away from light. Keep containers covered. If storage exceeds 2-3 weeks, use the water or flush it. Alternatively, skip storage and run RO water directly to your system on a schedule that matches your needs.
What if my rainwater collection system freezes in winter?
In Phoenix, winter freezing of outdoor collection systems is rare. However, if you experience freezes, drain your tank and lines before winter, or insulate them. Indoor filtration and storage avoid this issue entirely.
How often do I replace RO filters?
Sediment and carbon prefilters typically last 6-12 months, depending on your tap water quality. Phoenix’s high-TDS water clogs them faster; expect replacement every 6-9 months. RO membranes last 2-5 years. Track your pressure gauge; if it’s creeping up, prefilters are clogging.
Should I blend RO water with tap water to reduce costs?
Yes, selectively. If you’re growing leafy greens, blending 50/50 RO and tap water gives you a baseline EC of 0.3-0.4 mS/cm, still low enough for good nutrient control, while cutting RO production needs in half. For fruiting crops, stick to pure RO. Blending is a cost-optimization tactic, not a necessity.
Can I use distilled water instead of RO?
Distilled water is essentially RO water but made through distillation (boiling and condensing). It’s overkill in cost ($1-$2 per gallon) for hydroponic systems larger than 5 gallons. RO water is more economical. Use distilled only for small scale systems or specific pH calibration needs.
How does tap water affect flowering and fruiting stages?
High-mineral tap water can delay flowering in some crops because it increases vegetative nitrogen availability. It can also cause blossom-end rot in tomatoes and peppers due to calcium imbalances. RO water, combined with precise nutrient dosing, supports consistent flowering and fruiting. If you’re growing for harvest, RO is worth the investment.
What’s the best way to test water quality before I commit to a water source?
Buy a basic water test kit ($15-$30) that measures EC, TDS, pH, and hardness. Test your tap water at different times (morning, evening, after rain) to understand variation. If you’re considering rainwater, collect a sample after filtering and test that too. Most local water utilities (Phoenix Water Services, Grand Rapids Water System) publish annual water quality reports with detailed contaminant data. Read yours before deciding.
DIY Water Testing for Home Hydroponic Systems” → Water Quality Testing Guide
How do I know if my plants are suffering from hard water issues?
Early signs include yellowing between leaf veins (iron deficiency from high pH), slow growth despite good lighting and nutrients, white mineral crusts on hydro components, and rising pH without intervention. If you see these, your tap water’s mineral content is overwhelming your nutrient balance. Switch to RO or increase water change frequency.
Identifying Nutrient Deficiencies in Hydroponic Plants → Nutrient Guide
Final Recommendation: Start Here, Scale There
If you’re a complete beginner: Use tap water with an EC monitor and leafy greens. Spend $50 on the meter and test strips. Invest your time in learning system basics, not fighting water chemistry.
If you’re serious about variety (herbs + some peppers): Invest in a 100 GPD RO system ($300) and offset the cost with reduced troubleshooting and better yields. Payback is 2-3 months.
If you’re scaling toward multiple systems or commercial-level production: RO + rainwater hybrid is the path. Spend $1,500-$2,000 on a combined RO and rainwater setup. The consistency and sustainability are worth every dollar.
If you live in a humid, rainy region like Grand Rapids: Start with rainwater collection and supplement with RO if needed. Tap water, combined with rainwater, might be all you ever need.
Author Note
I’ve spent the last three years testing hydroponic systems in Phoenix, Arizona, starting with tap water and learning the hard way why Phoenix’s hard water demands adaptation. My journey from a single 5-gallon bucket to managing 100+ gallons across multiple systems convinced me that water source selection is a first-principles decision, not an afterthought. The mineral-heavy tap water in the Phoenix metropolitan area drove me toward RO, but I’ve also captured enough monsoon rain to appreciate rainwater’s potential as a supplement. This guide reflects real numbers from municipal water reports, equipment costs from January 2025, and lessons from growing basil, lettuce, peppers, and tomatoes indoors. Indoor and urban growing in Arizona’s constraints has become my passion, and understanding water chemistry is the foundation of every thriving system I build.
Share this:

Discover more from Soil Free Harvest
Subscribe to get the latest posts sent to your email.