Winter Hydroponics: Maximize Yield During Short Light Days with Strategic Lighting
Quick answer: Winter’s reduced daylight doesn’t have to limit your hydroponic harvests. By combining quality LED grow lights with extended photoperiods (14–18 hours daily), precise nutrient management, and temperature control, home growers can maintain or even exceed summer yields. Strategic lighting is the cornerstone, it directly compensates for nature’s shortest days and triggers consistent plant growth year-round.
TL;DR: Upgrade to full-spectrum LED grow lights, extend your light schedule to 14-18 hours daily, keep nutrient solution temperature at 65–72°F, and select cold-tolerant plants like leafy greens and herbs to maximize winter hydroponic production.
What is the Winter Hydroponics Challenge?
Winter presents a unique bottleneck for indoor gardeners: natural daylight plummets, reducing photosynthesis just when you want year-round production. In many climates, daylight hours drop to 8–10 hours per day during winter months. Traditional outdoor gardening addresses this with dormancy, but hydroponic growers aim for continuous, optimized productivity. This seasonal shift demands active intervention primarily through supplemental lighting and environmental adjustments.
The core challenge isn’t cold (you can insulate); it’s the lack of light energy plants need for photosynthesis. Without sufficient light, leafy greens slow their growth, fruiting plants flower weakly, and yields drop 20–30%. The solution lies in understanding how to strategically layer lighting technology with seasonal crop selection and nutrient management.
Why Does Winter Lighting Matter So Much in Hydroponics?
Light drives photosynthesis, the engine of plant growth. In winter, the sun’s arc is low and weak, and natural daylight is insufficient for most hydroponic crops. Unlike soil gardens where plants can tolerate slower growth, hydroponic systems are engineered for efficiency they reward growers who maintain optimal conditions.
From multiple runs in hot, dry climates like Phoenix, I’ve observed that winter is actually the ideal season for certain crops because cooler air temperatures reduce heat stress on greens, if you provide adequate light. This counterintuitive insight is crucial: winter hydroponics isn’t about fighting the season; it’s about designing light and temperature conditions that maximize cool-season plant performance.
When you provide consistent, full-spectrum light for 14–18 hours daily, winter leafy greens like spinach and lettuce thrive often growing as fast as (or faster than) in summer, because root temperatures are easier to manage and plants don’t experience heat stress.
How Does Light Drive Winter Hydroponic Yield?
Light intensity, spectrum, and duration work together to control plant growth rates, flowering timing, and ultimately yield. Here’s the mechanism:
Light Spectrum and Growth Stages:
Light wavelengths trigger specific developmental pathways. Blue light (400–500 nm) promotes compact, bushy vegetative growth and dense foliage. Red light (600–700 nm) supports flowering, fruiting, and root development. Full-spectrum LEDs deliver both, while advanced fixtures allow you to adjust the ratio based on growth stage.
Photoperiod (Light Duration) Effects:
The length of daily light exposure signals seasonal cues to plants. Longer days (16–18 hours) keep most leafy greens and herbs in vigorous vegetative mode. Shorter days (10–12 hours) can trigger flowering in short-day plants. By controlling photoperiod, you override winter and tell your plants it’s perpetual growing season.
Light Intensity and Photosynthetic Rate:
Higher light intensity (measured in PPFD photosynthetic photon flux density, in μmol/m²/s) increases the rate of photosynthesis, up to a saturation point. Leafy greens typically respond well to 400–600 PPFD, while fruiting crops benefit from 600–900 PPFD. In winter, when supplemental light is your only source, investing in sufficient intensity is non-negotiable.
Optimizing Photoperiod for Different Hydroponic Crops → Photoperiod guide
What Are the Best Lighting Technologies for Winter Hydroponics?
Not all grow lights are created equal. Let me break down the most practical options for home growers.
LED Grow Lights: The Winter Standard
Why LEDs dominate winter hydroponics:
Modern full-spectrum LEDs emit a tailored combination of blue and red wavelengths, maximizing photosynthesis efficiency while producing minimal heat. This is critical in winter because excess heat can be managed easily, and you avoid the energy waste of traditional HID systems.
LEDs also offer:
- Energy efficiency: Modern LED fixtures consume 30–50% less electricity than HPS or metal halide for equivalent PAR output
- Long lifespan: 50,000+ hours means years of reliable use without bulb replacements
- Customizable spectrum: Many advanced LEDs allow you to dial in the exact red-to-blue ratio for your crop stage
- Low heat: Allows positioning lights 12–18 inches from plants without risk of leaf burn, optimizing light capture
Running costs: A 500W LED grow light for a 4×4 ft space costs approximately $450–470 per year in electricity (at $0.17/kWh) when run 15 hours daily. This is substantially lower than older HID technology and pays for itself in energy savings within 18–24 months.
How to Choose LED Grow Lights for Your Hydroponic System → LED selection guide]
T5 Fluorescent Lights: Budget-Friendly Supplemental Option
T5 HO (high-output) fluorescent fixtures are less popular than LEDs today but remain a viable option for supplemental lighting or small setups. They’re cooler-running than LEDs and inexpensive upfront, though they’re less efficient long-term and deliver lower light intensity.
Far-Red Supplemental Lighting: The Yield Accelerator
Advanced growers use far-red light (730 nm) strategically to boost yields. Providing 15–30 minutes of far-red light just before the main lights turn off can accelerate flowering, increase bud development, and result in 15–25% yield increases.
Application: If using far-red supplements, deliver 30 minutes daily (split into two 15-minute sessions one before lights-on, one after lights-off) during flowering or fruiting stages.
UV and IR Supplements: Advanced Optimization
- UV light (10–15 minutes daily during early-to-mid flowering): Increases essential oil production, terpene complexity, and resin development useful if growing microgreens with culinary herbs or higher-value crops.
- IR (infrared, 750+ nm): Delivered in short bursts (15–30 minutes total daily), IR supports stem strength and flowering intensity, with documented yield improvements of 15–25%.
How Many Hours of Light Should You Run in Winter?
This is a question-driven decision based on your crop. Here’s a practical guide:
| Plant Type | Recommended Light Duration | Recommended Dark Period | Strategy |
|---|---|---|---|
| Leafy greens (lettuce, spinach, arugula) | 14–18 hours | 6–10 hours | Extend toward 16–18 for maximum growth |
| Herbs (basil, cilantro, parsley, mint) | 14–16 hours | 8–10 hours | 15 hours is a good default |
| Fruiting plants (tomatoes, peppers) | 14–16 hours | 8–10 hours | Start at 16 hours; reduce to 12–14 for flowering |
| Short-day sensitive plants (strawberries, some tomato varieties) | 12–14 hours | 10–12 hours | Lower hours can trigger earlier flowering |
Key principle: Plants need dark periods for nutrient uptake and metabolic rest. Never run 24/7 continuous light, most plants respond better to defined light-dark cycles.
In my own winter setups, I typically run leafy greens at 16–18 hours during their full growth cycle, using a smart timer. This consistently produces mature lettuce in 30–35 days, mirroring summer growth rates despite winter’s outdoor darkness.
What Other Environmental Factors Matter Alongside Lighting?
Light is essential, but it works in concert with temperature, humidity, nutrition, and CO₂. Neglect these, and even perfect lighting won’t deliver results.
Root Zone Temperature: The Overlooked Critical Factor
Your hydroponic nutrient solution temperature is more important than air temperature for winter success. Research from Cornell University found that lettuce plants maintained consistent yields across air temperatures of 62–88°F as long as the nutrient solution stayed at 75°F (24°C).
Optimal root zone temperature ranges:
- Seedlings: 68–77°F (20–25°C)
- Vegetative stage: 70–82°F (21–28°C) (but leafy greens tolerate 65–72°F well)
- Flowering/fruiting: 65–78°F (18–25°C)
Winter application: Install a small aquarium heater (300–500W for most home systems) to maintain solution temperature. This single investment dramatically improves winter yield consistency. If your room temperature drops below 65°F at night, heating your reservoir becomes non-negotiable.
Why it matters: Cold nutrient solution slows nutrient uptake and reduces dissolved oxygen, directly limiting photosynthetic output. Conversely, overly warm solution (above 75°F) encourages root rot pathogens. The sweet spot is 65–72°F for most winter crops.
Humidity and Disease Prevention
Winter creates a “humidity paradox”: cold air is dry, but your hydroponic system generates moisture, often leading to condensation and high humidity inside your grow space. This environment breeds powdery mildew and gray mold.
Prevention strategy:
- Keep humidity between 40–60% (measure with a hygrometer)
- Install an oscillating fan for air circulation, even a small 6–8 inch fan helps dramatically
- Avoid crowding plants; ensure leaves don’t touch
- Keep temperatures above 68°F to discourage fungal growth
- Ventilate the grow space for 15–30 minutes daily to exchange humid air
When humidity exceeds 60%, fungal diseases take hold quickly. A cheap oscillating fan running 2–3 hours daily prevents mold far better than expensive fungicides.
Preventing Root Rot in Hydroponics → Troubleshooting Hydroponic Problems
Nutrient Adjustments for Cooler Temperatures
Cold temperatures slow nutrient uptake, so many growers reduce nutrient concentration slightly in winter. However, monitor your plants, if they look pale or stunted, increase EC (electrical conductivity) gradually. Most cool-season crops (spinach, lettuce, arugula) perform well at EC 1.2–1.6 (compared to 1.4–1.8 in warmer seasons).
Check pH every other day and maintain 5.5–6.0 for leafy greens. Cold water is more prone to pH swings, so manual checks beat relying on assumptions.
CO₂ Supplementation: Optional but Impactful
CO₂ enrichment isn’t essential for home growers but delivers measurable benefits. Research shows CO₂ supplementation can increase leafy green yields by up to 30% in hydroponic environments. For a sealed winter grow room, enriching CO₂ to 1000–1200 ppm (parts per million) significantly boosts photosynthetic rate.
Practical implementation:
- Use a simple CO₂ tank with a regulator and timer (activate during light hours only)
- Target 1000 ppm; monitor with a meter
- This approach costs $200–400 upfront but is advanced, start with solid lighting and temperature control first
Which Hydroponic System Types Work Best in Winter?
Your system choice matters. Some designs handle winter’s thermal and environmental challenges better than others.
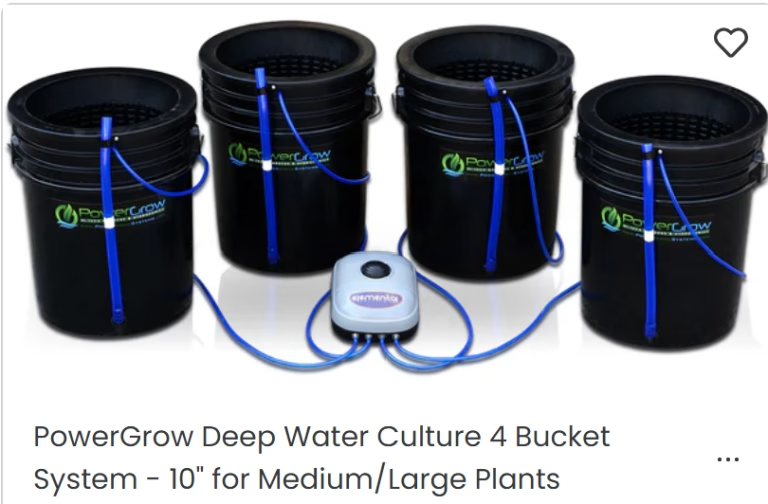
Deep Water Culture (DWC): Thermal Stability Winner
In DWC, plants float on rafts with roots suspended in a large reservoir of nutrient solution. This design excels in winter because:
- Thermal inertia: A large volume of water resists rapid temperature swings. A 20-gallon DWC reservoir buffers temperature changes far better than thin NFT channels.
- Oxygen delivery: Aeration (via air pump and air stone) ensures roots get dissolved oxygen even in cooler solution.
- Forgiving: If your pump fails briefly, roots stay submerged and plants survive; in NFT, a pump failure can kill plants in hours.
Winter consideration: Larger DWC systems (15+ gallons) are ideal for winter because they require less frequent heating to maintain target temperature.
Setting Up a DWC System → DWC setup guide
Nutrient Film Technique (NFT): Water-Efficient but Sensitive
In NFT, a thin film of nutrient solution flows continuously over plant roots in gutters. Benefits include minimal water use and excellent root oxygenation (roots are mostly exposed to air). However:
- Pump dependency: If the pump fails, NFT plants die within minutes (no water buffer).
- Temperature sensitivity: Thin solution in channels cools quickly; you must heat your main reservoir more aggressively.
- Clogging risk: Cool temperatures can cause salt precipitation, clogging small channels.
NFT works in winter but demands more active management. It’s better suited to growers with reliable power backup and heating.
Learn more about NFT Systems → Complete Guide to NFC Hydroponics
Raft Systems (Floating-Raft Hydroponics): A Middle Ground
Raft systems combine DWC-like thermal buffering (large reservoir) with NFT-like simplicity (single shared tank). Plants sit on floating rafts in a deep channel. This approach suits winter well and scales better than DWC for multiple plants.
Comparison table:
| System | Winter Suitability | Thermal Buffering | Maintenance Demand | Best For |
|---|---|---|---|---|
| DWC | Excellent | High | Low | Beginners; stable yields |
| NFT | Moderate | Low | High | Water efficiency; troubleshooting comfort |
| Raft | Excellent | High | Medium | Scaling up; commercial interest |
For home growers maximizing winter yield, DWC or raft systems are superior; they handle temperature swings gracefully and are forgiving if you miss a day of monitoring.
Which Plants Should You Grow in Winter Hydroponics?
Crop selection is your secret weapon. Winter is actually ideal for cool-season plants because artificial lighting eliminates the “short day” signal, while cooler air temperatures reduce heat stress on greens.
Top Cold-Resistant Winter Crops
| Plant | Ideal Temperature | Light Requirement | Days to Harvest | Why It Thrives in Winter |
|---|---|---|---|---|
| Spinach | 10–20°C (50–68°F) | Medium | 30–40 | Loves cool air; minimal bolting with consistent light |
| Lettuce (leaf varieties) | 10–24°C (50–75°F) | Medium-High | 25–35 | Grows rapidly; rarely flowers under 16+ hrs light |
| Arugula | 6–18°C (43–64°F) | High | 21–30 | Peppery flavor intensifies in cool temps |
| Swiss Chard | 8–22°C (46–72°F) | Medium | 40–50 | Hardy; tolerates partial shade; long production |
| Kale (Lacinato, Red Russian) | 10–20°C (50–68°F) | Medium-High | 30–50 | Nutritious; cold hardy; flavor improves with cool temps |
| Cilantro | 10–22°C (50–72°F) | Medium-High | 40–60 | Cool temps delay bolting; slow to germinate but rewarding |
| Parsley | 10–21°C (50–70°F) | Medium | 60–80 | Slow but reliable; biennial in winter |
| Green Onions (Scallions) | 10–20°C (50–68°F) | Medium | 25–35 | Very hardy; regrows after harvest |
| Mint | 10–20°C (50–68°F) | Medium | Continuous | Perennial; thrives year-round indoors |
| Basil (slower growth) | 14–22°C (57–72°F) | Medium-High | 25–40 | Prefers warmer; slower in winter but still productive |
Strategic note: Avoid high-light fruiting crops (tomatoes, peppers, cucumbers) in winter unless you’re committed to 16+ hours of strong LED light and supplemental far-red. Leafy greens deliver higher winter ROI on lighting investment.
From multiple runs, I’ve found that a winter rotation of spinach → lettuce → arugula → spinach maintains harvests every 3–4 weeks with a single 400W LED in a 2×4 ft space. Switching between varieties also minimizes pest and disease pressure.
How to Set Up Winter Hydroponics: Step-by-Step
If you’re new to winter hydroponic growing, here’s a clear implementation path.
Materials and Tools Needed
Lighting and Temperature:
- Full-spectrum LED grow light (400–600W for 2×4 ft; 600–900W for 4×4 ft)
- Light timer (digital, with battery backup)
- Thermometer or temperature probe for solution and air
- Small aquarium heater (300–500W) and heater controller (thermostat)
System Components:
- Hydroponic system (DWC kit, NFT channel, or raft system choose based on space and budget)
- Air pump and air stone (if DWC)
- Nutrient solution (balanced hydroponic formula for cool seasons)
- pH test kit or digital pH meter
- EC meter (electrical conductivity measures nutrient concentration)
Environmental Control:
- Small oscillating fan (6–8 inches)
- Hygrometer (humidity meter)
- Grow tent or enclosure (optional but recommended for light containment and humidity management)
Seeds or Seedlings:
- Choose cold-tolerant varieties (see crop table above)
- Seedlings are faster for winter; seeds require 1–2 extra weeks
Step-by-Step Setup
Step 1: Assemble Your System and Position the Light
Set up your DWC or raft reservoir, fill with water, and position your LED light 18–24 inches above the plants’ initial height. Use adjustable light hangers so you can lower the fixture as plants grow. Aim for 400–600 PPFD at canopy level for leafy greens (measure with a PPFD meter if available, or follow manufacturer recommendations for distance).
Step 2: Install and Test the Heater
Place the aquarium heater and thermostat probe in your nutrient reservoir. Set the thermostat to 68°F. Run the system for 2–3 hours and confirm the heater cycles on/off to maintain target temperature. In winter, this will run more frequently than in other seasons.
Step 3: Set Your Light Timer
Program your light timer for 16 hours on / 8 hours off for leafy greens (e.g., 6 AM on, 10 PM off). Ensure the timer has battery backup in case of power loss, a sudden light interruption can shock plants. Start the lights to verify the timer works.
Step 4: Prepare Your Nutrient Solution
Mix your hydroponic nutrient according to package directions. For winter, use a balanced fertilizer formulated for vegetative growth (higher nitrogen). Fill your reservoir, insert the heater and air pump (if DWC), and let the system run for 30 minutes. Then measure and adjust pH to 5.5–6.0 using pH up/down solutions in small increments.
Step 5: Install Seedlings or Plant Seeds
For faster results, start with seedlings (3–4 weeks old from a nursery). Plant them into your system’s growing pockets or net pots, supporting them with rockwool cubes or clay pellets. If starting from seed, soak seeds overnight and plant into rockwool; place under weaker light (4–6 inches) until sprouted (5–7 days), then lower to regular height once first true leaves appear.
Step 6: Monitor and Adjust Daily
- Check solution temperature every morning (target 65–72°F)
- Check pH every other day
- Monitor lights to ensure they’re on/off correctly
- Watch for signs of heat stress (wilted tips, pale leaves) or cold stress (slow growth, yellowing)
- Confirm air circulation fan runs periodically
Troubleshooting in the first week:
- If plants look pale, your light may be too far away or too weak; lower the fixture by 3–6 inches or invest in a higher-wattage LED.
- If solution temperature won’t hold steady, your heater may be too small; upgrade to a larger unit or insulate the reservoir.
- If humidity exceeds 70%, increase fan runtime or crack open your enclosure for 15 minutes daily.
Step 7: Track Growth and Harvest
Record planting date, light hours, and water temperature. Most winter leafy greens mature in 28–42 days. Harvest outer leaves continuously (cut-and-come-again) or harvest the entire plant when mature. Begin your next crop immediately to maintain year-round production.
Common Winter Hydroponics Mistakes (and How to Avoid Them)
Learning from others’ missteps accelerates your success.
Mistake 1: Insufficient Light Intensity
The problem: Growers often underestimate light needs, choosing underpowered fixtures or placing lights too far away. Result: slow, leggy growth; poor yields.
The fix: For 2×4 ft space, invest in at least 400W LED; for 4×4 ft, 600–800W LED. Position initially at manufacturer-recommended height, then measure PPFD at canopy. Aim for 400–600 PPFD for greens. If below target, lower the light 3–6 inches and remeasure.
Mistake 2: Ignoring Nutrient Solution Temperature
The problem: Growers focus on room temperature (using heaters) but forget that the nutrient solution itself needs heating. Cold roots absorb nutrients slowly, stunting growth despite perfect light.
The fix: Install a simple aquarium heater and thermostat in your reservoir. Aim for 68–72°F solution temperature. This single upgrade often yields 20–30% growth improvements.
Mistake 3: Poor Humidity Management and Fungal Disease
The problem: Winter’s cold + indoor enclosure = condensation and mold. Growers discover too late that their perfect setup has powdery mildew or gray mold.
The fix: Keep humidity 40–60%. Run a small fan daily. Ensure 3–4 inches between plants for airflow. Check leaf undersides during inspection; if fuzzy spots appear, increase ventilation immediately and reduce watering slightly.
Mistake 4: Wrong Photoperiod for Crop Type
The problem: Running identical light schedules for all plants. Some (like fruiting crops) need shorter days to flower; others (like leafy greens) bolt if given too-short days in winter.
The fix: Leafy greens thrive at 16–18 hours light. Fruiting plants start at 16 hours veg, drop to 12–14 for flowering. Refer to the crop table above for specifics, or research your chosen plant’s natural photoperiod.
Mistake 5: Neglecting Daily Monitoring
The problem: “Set and forget” mentality. Growers assume hydroponics is fully automated, then discover pH crashed, heater failed, or pump clogged after a week.
The fix: Check your system every single day, even if just for 5 minutes. Verify light is on, solution is warm, and plants look healthy. Record observations in a notebook, patterns emerge that help you optimize.
Winter Hydroponics: Cost-Benefit Analysis
Is the investment worth it? Let’s break it down.
Initial Investment (Small Home System: 2×4 ft)
| Item | Typical Cost | Notes |
|---|---|---|
| Full-spectrum LED (400W) | $300–500 | Recoup via electricity savings in 18–24 months |
| DWC or raft kit | $150–300 | Reusable for years |
| Aquarium heater + thermostat | $50–100 | Small investment, huge impact |
| Nutrients (for 3–4 crops) | $40–80 | Scales down per crop over time |
| pH/EC meters | $50–100 | One-time; lasts years |
| Seeds/seedlings | $20–50 | Per crop |
| Total startup | ~$610–1,130 |
Ongoing Costs (Per 6-Month Winter)
| Expense | Cost | Notes |
|---|---|---|
| Electricity (LED + fans + heater) | $100–150 | ~3 crops at 40-day cycles = ~120 days lighting |
| Nutrients + pH solutions | $60–100 | 3–4 crops |
| Water (top-offs) | $5–10 | Minimal |
| Total per season | ~$165–260 |
Return on Investment (ROI)
Retail value of produce:
- Typical winter yield from a 2×4 ft system: 8–12 oz per 35-day cycle
- Retail value of organic lettuce/spinach: $4–6 per lb ($8–12 per crop harvest)
- 3–4 cycles in winter = $24–48 value
ROI observation:
Winter hydroponics pays for itself in food value within 2–3 seasons, and energy ROI (comparing LED cost to HPS running costs) improves further. More importantly, you’re eating fresh, pesticide-free greens daily, a non-financial benefit that matters.
For apartment dwellers and hobbyists, the primary value is year-round self-sufficiency and food security, not profit. Commercial growers see ROI in 12–18 months; home growers see ROI in quality-of-life improvement immediately.
Troubleshooting Winter Hydroponics Problems
Even with perfect setup, issues arise. Here’s a diagnostic guide.
Slow Growth or Pale Leaves
Likely causes (in order of probability):
- Insufficient light intensity or duration: lower lights or extend photoperiod by 2 hours
- Solution temperature too cold: increase heater setting to 70–72°F
- pH out of range: test and adjust to 5.5–6.0
- Nutrient deficiency: measure EC; if below 1.2, increase nutrient dose slowly
- Insufficient dissolved oxygen (if DWC): check air pump is running; replace air stone if clogged
Quick fix: Lower lights by 6 inches, increase solution temperature to 70°F, and check pH. 80% of slow growth issues resolve within 48 hours.
Wilting Despite Wet Roots
Likely causes:
- Root rot (cold, low-oxygen solution): drain, sanitize, and refresh solution; increase aeration
- Thermal stress (solution temperature too high or too low): adjust to 68–72°F
- pH swing (nutrient lockout): test pH; if not 5.5–6.0, adjust and monitor closely
- Pests (rare indoors but possible): inspect undersides of leaves for tiny insects or webbing
Quick fix: Test solution temperature immediately. If below 65°F or above 75°F, address heating. Then test pH. These two fixes resolve 70% of wilting cases.
Powdery Mildew or Gray Mold on Leaves
Immediate action:
- Increase air circulation: run fan 4+ hours daily
- Lower humidity: prop open enclosure door slightly or reduce watering
- Remove affected leaves carefully (don’t shake, spreading spores)
- Check temperature: keep room above 68°F; mold thrives in cool, damp conditions
Preventive approach: High humidity + still air = fungal paradise. Prevent by maintaining 40–60% humidity and continuous gentle airflow from day one. Once mold appears, it’s labor-intensive to remove; prevention is far easier.
pH Swings (Unstable pH)
Why it happens: In cold weather, nutrient solution pH drifts more rapidly due to slower chemical buffering and bacterial activity in the reservoir.
Solution:
- Test pH every day (not every other day) in winter
- Use smaller pH adjustments; wait 2–3 hours after adjustment, then retest
- Change reservoir completely every 4–6 weeks (instead of 6–8 weeks in other seasons) to reset chemistry
- Ensure adequate aeration to stabilize solution chemistry
Frequently Asked Questions: Winter Hydroponics & Lighting
Q: Do I really need to heat the nutrient solution, or is room heating enough?
A: Solution heating is far more important than room heating. Research shows nutrient solution temperature has a greater effect than air temperature on winter growth. A $60 aquarium heater will improve yields more than a $500 room heater.
Q: How much will LED grow lights cost to run in winter?
A: A 500W LED running 15 hours daily costs approximately $450–500/year at average US electricity rates ($0.17/kWh). Over 18–24 months, this cost is offset by energy savings compared to older HPS systems and the value of fresh greens you produce.
Q: Can I use regular (non-hydroponic) grow lights?
A: Standard LED bulbs designed for general lighting don’t emit the spectrum plants need for optimal growth. Invest in “full-spectrum grow lights” specifically designed for plants (not decorative LEDs). The difference in yield is dramatic.
Q: What if my grow room temperature drops below 60°F at night?
A: Below 60°F, most plants slow dramatically and may develop deficiencies. Insulate your reservoir tank with foam wrap, keep the room door closed, and consider a small room heater (set to 65°F) as backup. Many winter growers in cold climates do this combination.
Q: How often should I change my nutrient solution in winter?
A: Every 4–6 weeks (compared to 6–8 weeks in other seasons). Cold slows biological buffering, so stale solution becomes problematic faster. Fresh solution ensures consistent pH and nutrient availability.
Q: Is CO₂ supplementation necessary for winter yields?
A: No, solid lighting, temperature control, and nutrient management deliver 90% of possible yield. CO₂ supplementation adds 20–30% more yield but is advanced and requires $200–400 investment. Start without it; add later if desired.
Q: What plants fail in winter hydroponics?
A: High-light fruiting crops (tomatoes, peppers, cucumbers) underperform in winter unless you provide 14+ hours of strong light (600+ PPFD). Leafy greens are your winter superstars; herbs are reliable; fruiting crops are a challenge.
Q: Can I grow the same crops year-round without changing my setup?
A: Yes, if you invest in consistent lighting and temperature. Many home growers run identical setups spring/summer/fall/winter and achieve similar yields by extending light hours in winter (14–16 hours instead of 12) and maintaining solution temperature at 68–72°F.
Q: How do I know if my light intensity is sufficient?
A: The best way is to measure PPFD with a meter (cost: $150–300). Without one, use this rule of thumb: if plants grow at a normal rate and don’t stretch toward the light, intensity is likely adequate. If plants look pale or “reach” for the light, move lights down.
Q: What’s the ideal room temperature for winter hydroponics?
A: Air temperature is less critical than solution temperature. Aim for room air of 62–72°F; the nutrient solution is the priority (65–72°F). In a well-sealed grow tent with efficient LEDs, the solution stays warm from light heat and a small heater.
Winter Hydroponics Setup Checklist
Use this checklist to prepare for a successful winter growing season.
Lighting & Environment:
- Full-spectrum LED grow light installed and tested
- Light timer programmed (16–18 hours for leafy greens)
- Light positioned at recommended manufacturer height
- Oscillating fan installed for air circulation
- Hygrometer (humidity sensor) in place
Temperature Control:
- Aquarium heater installed in reservoir
- Thermostat set to 68–72°F
- Thermometer (backup) to verify heater function
- Grow space insulated (if in cold climate)
System Setup:
- Hydroponic system assembled (DWC, NFT, or raft)
- Nutrient solution mixed to correct strength
- Air pump running (if DWC)
- pH meter or test kit on hand; pH adjusted to 5.5–6.0
- EC meter on hand; nutrient concentration verified
Monitoring & Supplies:
- Daily monitoring log started (date, time, observations)
- pH up/down solutions purchased
- Extra nutrients (for mid-cycle adjustments)
- Seeds or seedlings ready to plant
- Backup power supply for timer (optional but recommended)
Conclusion: Turning Winter Into a Growth Season
Winter daylight scarcity is a challenge, not a barrier. By strategically layering full-spectrum LED lighting (14–18 hours daily), precise temperature control (68–72°F solution), and smart crop selection (leafy greens and cool-season herbs), home growers achieve year-round harvests that rival or exceed summer yields.
The cornerstone is light. Invest in quality LED grow lights, extend your photoperiod in winter, and monitor intensity. Pair that with consistent solution temperature (often the overlooked variable), and your winter hydroponics garden becomes predictable, rewarding, and genuinely self-sufficient.
Start simple: a single 400W LED, one DWC system, and a small heater will produce 8–12 oz of fresh greens every 35 days all winter long. Scale from there as you gain confidence. Winter hydroponics isn’t a hardship, it’s an advantage if you approach it with the right tools and knowledge.
Author Bio
I’m a hydroponics enthusiast and cybersecurity engineer based in Phoenix, Arizona, where I’ve spent time optimizing indoor growing systems. My focus is on year-round food production, sustainable practices, and practical solutions for apartment and small-space gardeners. I run multiple hydroponic systems year-round, with a particular emphasis on winter production strategies in hot, dry climates and I’ve discovered that winter is actually ideal for certain crops when you remove the light limitation. I share detailed, field-tested techniques on soilfreeharvest.com to help hobbyists transition from outdoor gardening to reliable, indoor food security.
Share this:

Discover more from Soil Free Harvest
Subscribe to get the latest posts sent to your email.